The post Get a Better Tone on Your C, C#, D, and Eb appeared first on DoctorFlute.
]]>This issue is something that I spent a lot of time on in college. I believed that practicing long tones would help me fix it. I did oodles and oodles of long tones. However, I did not make as much progress as I expected from all that practice.
So let me explain the keys to getting these notes.
Number one, make sure you’re covering all the holes.
You probably have an open-hole flute. Make sure that your fingers are completely covering the holes. I have seen this issue so many times with my students. Their fingers are leaking because they don’t cover the hole all the way. Then, when we work on it, they cover the holes all the way, and all of a sudden it changes everything.
However, along those lines, if your keys are leaking, it’s no fault of your own. It’s just that the mechanism itself is leaking. These leaks will show up on an E-flat or a D. If they are leaking, take your flute to a technician and have the pads checked.
So that’s something just to look at as well. The main thing is covering all the holes.
Number two, aim the air slightly differently.
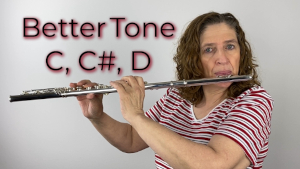
Getting a better tone on your C, C-sharp, D, and E-flat may require you to aim the air across the strike edge just slightly differently.
When I play these notes and notice that there’s a little bit of lessening of the tone quality, it’s my job to mitigate that lessening of tone quality. So, I change the angle on this strike edge, and that can make all the difference. I will blow slightly down more on that E-flat than I did for the F, and that helps me.
Now I don’t even think about that anymore while I’m playing. My embouchure has been trained to know what to do. It just does it automatically on its own. You can train your embouchure too. Experiment with the angle of your air until you get a consistent tone.
Number three, lower your jaw slightly more.
Creating more space between your teeth, meaning they’re more open on the inside, can make a big difference in your tone.
By the time I reach the C, my teeth are probably about a finger’s width apart. When I hit that C-sharp and I go down, I need at least a finger’s width between my teeth. And above that, it’s definitely going to be a little bit closer. It’s not going to be as open because your airstream is different there. So, it just makes sense that you’re closing up a little bit. And so oftentimes, not only is it the airstream, but you keep your teeth closed too much, and that doesn’t help that middle area, that transition area.
We can fix the issue during lessons.
When I show students during lessons how to fix this right now, not four weeks down the road after they’ve been doing long tones, that you can get a good tone right there, right now, their eyes are open and it’s like a miracle has happened because, kind of, it has.
It’s just like, wow, I don’t have to work as hard as I’m working, trying as hard as I can, and it’s not working. No, you just need some key components, and all of a sudden that area of tone can open up to you, and now you can have consistent octaves.
Instead of starting off playing with one tone color, then changing when you get into the middle, and then getting it back later on as you go up higher, you can focus the tone all the way through. You get it right away. So, it really is sort of a mini-miracle.
So, you need to cover all the keys, focus the air, and lower your jaw. Above all else, don’t be satisfied with getting a bad tone in this area.
Alright, now you go ahead and experiment with that. Work on that middle area with your long tones and see what happens with your C, C-sharp, D and E-flat area between the first octave and the second octave and see what you can do with that. I think you’ll be happy that you’ve made these changes and now you’re getting the sound you want.
Have fun!
DoctorFlute
Watch me demonstrate this on the Brögger Flute, a beautiful Brannen Brothers handmade flute!
Get a Better Tone on Your C, C#, D, and Eb – FluteTips 187
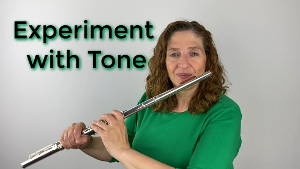
Experimenting with Tone – FluteTips 176
Getting a Better Tone Quality on Your Middle Notes C C# D Eb – FluteTips 161

Finding Your Tone with a New Headjoint – FluteTips 158

Practice Articulation to Improve Your Tone – FluteTips 155

Tight Embouchure No Problem – FluteTips 182

How to Form a Great Flute Embouchure – FluteTips 132

The post Get a Better Tone on Your C, C#, D, and Eb appeared first on DoctorFlute.
]]>The post Playing the First Notes of Your Solo appeared first on DoctorFlute.
]]>Start with the Sound You Want
Your goal is to have the first note come out with a fabulous tone, vibrato, liveliness, and color. The first note tells the audience what’s coming next.
We all know what we want to sound like when we perform. To get there, it’s important to start there.
But sometimes we think that the first note is too short to put on some vibrato. Perhaps we don’t consciously decide to not put on vibrato. It just doesn’t happen.
Always ON Vibrato
Here’s how to make sure that the very first note has presence:
Decide now, that every time you pick up your flute, it’s as if a switch has flipped and your vibrato is turned on. Your vibrato default setting is “ON.”
Convince yourself that your vibrato setting is always on. Then when you start a piece, the first note comes out with vibrancy and life. Your sound will be lively from the start.
If I start without vibrato, it starts off dead. There’s no life to that first note. But the quality when it has a liveliness is amazing.
When that first note is not long enough to have vibrato, you can still decide what you want to do with it. You can know exactly what tone you are looking for. You can play around with embouchure placement. You can move it around on your lip. You can adjust that angle of your air across the lip plate strike edge. Figure out where you get the best tone. Then every time you pick up your flute to play that again, you have the makings of a lively tone.
Lively Start
Then, even though it’s not long enough to hear vibrato, you’ll start with that tone having liveliness and vibrancy. It’s going to start alive. The audience can tell that you’re excited for something that’s coming.
Are there times where I might not want vibrato? Sure. The opening of Afternoon of a Faun. Most flute players start with no vibrato. Part of the reason in this opening is to conserve air. You know what I mean if you’ve played this piece. But it also gives you the ability to change the colors. You’re manipulating your vibrato and that opening note, but you’re doing it consciously. You’re doing it because that’s the color you want. That’s what you want to create.
You might also start the Fauré Fantaisie without vibrato, as many intermediate flutists often do. But it’s more often that it’s just not even thought about what you want to do with that note.
It just starts with no vibrato without any rhyme or reason. Now, I might want to start off with no vibrato, but I’m going to think about it. What if I were to start with vibrato?
We need to start with vibrato unless it’s a conscious thought to not. But I think it’s more often than not, we start with no vibrato, with no real reason, except that you just didn’t put vibrato on it.
Start with your vibrato going. Your motor is going right off the bat.
Because when you start with that vibrato, it has a life and movement, and it’s going somewhere right away.
Record Yourself
Record yourself when you’re practicing for a performance. Identify how you want to set up that first note for what is going to come. Determine whether that first note has a fabulous tone and vibrato and liveliness and color. Does it tell your audience what’s going to be coming?
The first note should make the audience sit up in their chairs, on the edge of their seats, excited for what is to come.
Listen to yourself. Plan that first note with just a little bit more thought. And it can change your whole piece. By doing that, it really can change your whole piece because you now have a different attitude about the whole piece.
Focus on that first note!
Have fun!
DoctorFlute
Watch me demonstrate this using:
Mozart Flute Concerto
Fauré Fantaisie
Jade from Ferroud’s Three Pieces
Playing the First Notes of Your Solo – FluteTips 186

FluteTips 84 Adding Vibrancy to Your Tone on the Flute

Producing a Lively Sound on the Flute – FluteTips 115

The post Playing the First Notes of Your Solo appeared first on DoctorFlute.
]]>The post Tight Embouchure No Problem appeared first on DoctorFlute.
]]>NOT EVER
What I mean then is that if you have a tight embouchure, it is no problem for you to fix it. You can learn to play without a tight embouchure, which will noticeably improve your tone.
Why Tight
The way a tight embouchure usually develops is when you start flute, and while you play, you got dizzy. So, I’m sure you all remember at least the fact that you got dizzy if you don’t remember what that felt like. You got dizzy because as little kids, we think we have to blow a lot. We don’t know that really the less you blow, the better your flute tone. And in order to compensate for that, especially if you were a band flute at school and you never had any private lessons, chances are the way to combat being dizzy when you played flute was to develop a tight embouchure.
I’m Dizzy
If you have a smaller embouchure, that gives your tone more focus because the smaller it is, the more air you compress inside and it’s going to only let out a sliver. For example, if I play a hi G with sort of a beginner sound, I will be completely out of breath. Then, if just keep taking more breaths, then blow it all out, I start feeling dizzy. So, you compensate by tightening up your embouchure.
I could play a whole lot more notes because I make my embouchure really tiny by firming up or tightening everything – you pull the corners back, you make it a tiny little hole, and that’s how you compensate for all that air that came out.
Band Blast
Another reason why that tight embouchure developed was maybe in band in high school band you had something that all the flutes, all 18 flutes, because sometimes there’s a lot of flutes, had to play in that third octave. And the band director says, it’s too loud. So, half of you drop out or only two of you play and all the rest of you 15 flutes, just sit there until that part’s over and then join back in. And to compensate for that was to be really, really tiny because then you could play a lot softer. So, what is the big deal if when you tighten up, it still focuses the sound, right? It is a decent sound among the other flutes in the band.
Solo Reveal
Well, the problem with that is as you go on with your flute life, what you’re going to discover when you’re playing solos is that your range from forte to piano is very narrow. You can’t do anything. And if you heard anybody talk about different colors, that tight embouchure can’t give you anything but one color. You cannot get that woody embouchure that you would typically play a Bach sonata.
Not Flexible
To get a woody embouchure, you have to change your embouchure. That means my embouchure would have to be flexible to get a color change, even to move to a more modern sound. Plus, it is much harder to get a good tone forte to piano with a tight embouchure.
The Solution
Okay, now what do you do about it? Well, I have some videos that really talk and go into how to develop this loose, relaxed embouchure. So, check those out. But right now, let me just say what you need to do is elongate a little bit. So, this makes you wide, right? You need to go long in your embouchure as when you say “awe.”
You cannot pull these corners back and make it tight if you are thinking awe. Now in my low register, I am very much awe. When I go up to the middle and high, I’m a little more ooh, but the thing that changes, I am never eee. Unless I want a certain color that gives me edge, a more modern tone color.
Another Tool
But the thing is I have got that in my tool basket. I could decide to use it and I could decide not to use it. It is up to me what I am going to do because my natural embouchure is much more awe.
I am just much more open this way. I am trying to think about having a natural relaxed look on my face. But do not overthink this as a student once did with these totally relaxed flabby lips. We have to have some type of flute embouchure. We cannot just be flaccid and just be totally natural. It does not work!
Coke Bottle
So, I just say loosely “awe” embouchure like you would blow into that Coke bottle to make a whistling sound. Or take your headjoint off and blow down into it. If you widen and tighten your embouchure, you are probably not going to make any sound.
Stay relaxed with that awe, see that the corners of your embouchure are not pulled back at all. They’re just awe. Look in the mirror and see what you look like naturally. You want to maintain that embouchure.
That awe shape, at least for a middle, A flat, your index finger should fit in between your teeth. You can check elsewhere I have discussed teeth spacing at length.
New Problems
When you start changing from a tight embouchure to a natural loose, relaxed embouchure, you are going to find a lot of errors coming out really fast. And you might find yourself getting dizzy again.
I have had that many students say, okay, yep, I’m dizzy. I’ve got to stop playing. The answer to that is all about breathing and about support and how support is pressure and holding in your air.
Support
Again, you can look at my videos on breathing and how you create pressure, also known as support. So, if you heard the term support, it’s pressure because that tightening of your muscles, that pressure you create, will control that air so you can maintain a loose embouchure and not use up all your air.
So, look in the mirror. Are you playing with a tight embouchure? And if so, you can fix it. You can fix it quickly. You need to be thinking about your breathing. If you just start loosening up your embouchure because so much air is going to come out, you are going to have to learn how to control that air. It’s all about holding in the air. And if you hold in the air and create pressure, then your embouchure can be as loose as it wants, even up there in your third octave.
Mirror Mirror
So, check out in the mirror what your embouchure looks like, learn to loosen it up to relax your embouchure. Use support so that you can still have a great tone and make your tone go from forte to piano in a much wider range with beautiful colors.
Try it out. You are going to enjoy working on your embouchure, although it can be a little bit of a pain in the neck, it might cause you a little bit of frustration, but you can do it and you will love the results.
Have fun!
DoctorFlute
Watch me demonstrate this:
Tight Embouchure No Problem – FluteTips 182
How to Form a Great Flute Embouchure – FluteTips 132

Making Your Embouchure Be Flexible While You’re Playing

Relax Your Embouchure to Improve Your Tone – FluteTips 154

Loosening Your Embouchure While You Are Playing – FluteTips 165

The post Tight Embouchure No Problem appeared first on DoctorFlute.
]]>The post Failure to Plan for Your 3rd 8va Notes is a Plan to Fail appeared first on DoctorFlute.
]]>One time I was going for a high D (4th octave) at a performance with a quartet that I was in, and I did not plan well enough for that high D. So, it did crack, and that has been bothering me ever since. I am talking about this because it is near and dear to my heart.
Kid Sister
Planning for your 3rd octave starts with a kind of empathy or understanding that leads to a special type of care or concern. I remember a theory teacher who talked about the French sixth chord as being kind of like your little sister. We must treat it carefully (meaning resolve it). That’s a great analogy for our third octave notes. They are like your little sister. You must treat these notes a little bit more carefully than you do the first two octaves. In our third octave we must do something different. Our first two octaves are so similar. We change our embouchure between the first two octaves, but they are subtle changes. We can’t use a middle register embouchure and play great resonant low notes. I’m not saying everything is the same, but we have two octaves where we’re basically using the same fingerings and not a huge difference in our air supply. But soon as we go above that high C and we get into that third octave, there are more things to be conscious of as we approach these notes.
Support
First, they need more support. I need to have tighter muscles pushing up on those high notes. These muscles must be much tighter, and they actually have to push up. So, if I’m going for a high B flat in this Hindemith Sonata I’m preparing ahead of time, making sure I have enough air and then enough air pressure in those stomach muscles to get that high Bb without cracking. My stomach contracts so that I can get that high note out and not blast. So, if I use that extra lift in my support and push up, then it doesn’t have to screech out. I can hold that air in, keep the embouchure relaxed, and keep the tone so that it doesn’t become shrill.
Plan Ahead
Now when you are playing a fast passage, you must plan ahead. You must know that this high note is coming and take the kind of breath you need ahead of time in order to prepare for that note. If you are going to the top of that range and you’ve lost your support because you’re running out of air, guess what’s going to happen? Nothing good!
For the piece I was performing I had to play a 4th octave D after a B and followed by a C#. I wrote on my music where to breathe with a Big Breath which I abbreviate BB. This means tank up as much as I can and then tighten up and hold that air. Sometimes I’ll also write “hold” over that passage to remind me that I can’t use up too much air so that I have enough air to make it to that high D. You might need to write notes. And then you know what? Practice, practice, practice. You’ve got to practice your plan.
Practice Your Plan
So where are the high notes that you’ve missed in your solos? Go find those spots and make a plan, what do you need to do to prepare your mind? You’ve got to get your head around it, prepare your breathing, get your support ready, and allow your embouchure to be open. Prepare for those high notes. Failure to plan is a plan to fail, and you don’t want to have that happen in a performance situation. Hey, we’ve all performed and not done our absolute best. We all have those times, so I’m not ashamed to admit that I missed that high D, but I’ll tell you that that’s the only time I’ll miss that high D.
Go For It
It won’t happen again because I know I need to not let that little niggly doubt creep in. I need to just go for it because I know that I’ve planned this out so there’s no failure. I have planned and now I’m going to get that high D the next time I perform it, which is next week, I have another performance on that piece with my quartet slash trio, and I will be playing that piece again and I guarantee I’ve got my plan in place and it’s going to work this time.
You check out where your high notes are and don’t miss them because you’ve planned it. You’ve mentally prepared for it. Your breathing is in place and it’s going to work for you. Then go for it. Sometimes that’s what you must do. Go for it!
Have fun!
DoctorFlute
Watch me demonstrate this:
Failure to Plan for Your 3rd 8va Notes is a Plan to Fail – FluteTips 181


Getting Spin on Your Third Octave Notes – FluteTips 171

Octave Slurs for Better High Notes on the Flute – FluteTips 125

Perfecting Your Third Octave Flute Tips 105


The post Failure to Plan for Your 3rd 8va Notes is a Plan to Fail appeared first on DoctorFlute.
]]>The post Arm Placement for Better Tone appeared first on DoctorFlute.
]]>Did you know that arm placement can influence your tone? It can also affect the long-term health of your flute playing. There is a lot that can be thought about with the positioning of the arms to help create the most relaxed yet functional flute playing, and the surprising thing is it can affect tone as well.
Let’s get into arm placement and do some experimenting with the position of the arms and the angle of the flute.
I was reading an article by Patricia George who is great teacher and was editor of Flute Talk. She has a series of books with her flute partner Phyllis Avidan Louke. They have many good lesson and exercise books that are really quite valuable. If you haven’t looked at their books, you should. But I was reading what she was suggesting about arm placement and tone, and I thought, you know what, I need to experiment with that.
Prior to this I hadn’t given arm placement a great deal of thought. I certainly had never experimented with changes to see if doing something different would enhance my tone or give more relaxation to the arms and wrists. For this I had to go to the mirror to see what I was doing naturally.
Arm placement
If you ever played in marching band, you know that you are playing with a straight flute and elbows high. It is what is required by band directors. I always know when it’s marching band season because my high schoolers come to with their arms and elbows stiff and straight. And guess what? They are not getting a fantastic tone.
That looks really good in marching band, but it isn’t how you get a great tone and if that posture were to continue you would eventually cause yourself repetitive injury issues. Now, I bet none of you are playing with your arms as straight as that. But look in the mirror and analyze what is happening.
In Patricia George’s post she said (I believe she was quoting one of her teachers) that the only thing that should hang on your flute are your arms and your jaw. I think what is meant by “jaw hanging” is just that you need to have a relaxed embouchure. It should just be loose and relaxed.
What about the arms? If I bring my flute up to my lip, how should my arms be positioned? I’ve had students where they really hang their arms in a not so good way. If they hang too much on the flute, then the fingers are affected and not at their optimal angle. You don’t want anything awkward when you’re talking about your arms. When I put my flute up to my lip, I want a natural angle of flute to arms.
I have often told my students, don’t look like you are hanging on a branch or that you are pulling yourself up and holding so you don’t fall off. There does need to be an angle from fingers through the wrist to your elbow but it’s a relaxed angle in your elbow. I don’t want to do anything forced. When thinking about the right arm and elbow, I generally recommend that you should bisect that angle that would be created from the two extremes. More specifically if you thought about one extreme being your arm is hanging down like you are hanging from a branch and the opposite being that you are marching band straight causing strain on your wrist, that would be a 90-degree angle. Somewhere in between the two is the right place for you. I like to have my students do the marching band position and then lower the elbow until the strain on the wrist goes away. Whatever angle gives you relaxed hands.
Forward Arms
Another point that Patricia George brings up is about how the end of the flute should be past your nose. If you were in marching band that flute is straight from your nose through the shoulders to the end of the flute. This makes the flute line look really good for the judges when they look down the line. What is really suggested here is that the arms should move the flute forward a bit so that there if someone were to look sideways at you with your flute up, they would see the flute create a bit of an angle between your embouchure and the end of the flute.
The idea is that this position gives you more projection, a bigger sound and better intonation.
Stand in front of a mirror and experiment with pushing the flute a bit forward. Do your usual way and then move the end of the flute forward and see what this does for your playing. Use a tuner and see what difference that can make.
Always remember that experimenting for what works best for you is the goal. The goal is not to do everything exactly as everyone else says to do it. By experimenting with these ideas, you can find what works best for you.
So, perhaps you need to change your angle. I’m here to give you the freedom to just try it. Sometimes, we get stuck and don’t think we can change but we can!
Experiment with the position of your arms and their angle and see what gives you the most relaxed arms and the best sound!
Have fun!
DoctorFlute
Watch me demonstrate this:
Arm Placement for Better Tone – FluteTips 180


10 Commonly Asked Questions About the Flute – FluteTips 143

The post Arm Placement for Better Tone appeared first on DoctorFlute.
]]>The post Flute Articulation – Focus on Your Tah appeared first on DoctorFlute.
]]>There are differing ideas on tongue placement, and I think they can all be used for various reasons. But I want to discuss the unfocused Tah sound. You know that one especially in the low register where sometimes it’s a puff of air rather than good tone quality.
Here are some practical tips to improve your tone quality by focusing your Tah when articulating.
- The Importance of Articulation Practice
First and foremost, let’s establish the significance of practicing articulation. It’s not just something you do in passing; it should be an integral part of your practice routine. Whether you’re warming up, working on scales, or diving into your etudes, incorporating articulation exercises is essential. Variety in your articulation patterns helps you develop versatility and adaptability in your playing.
- The Precision of the “Tah”
Let’s delve into the heart of the matter—the “tah” articulation. I often find that many of my students, even those at the college level, tend to use too much air when articulating. This excess air behind the tongue can lead to imprecision and a lack of control.
- Tongue Placement Matters
To master the “tah,” you need to pay close attention to tongue placement. Your tongue should be as far forward as possible without touching your teeth. This precise placement results in a sparkling, pointed articulation, which is crucial for achieving a clear and focused tone.
- The Art of Air Control
A significant part of achieving a well-focused “tah” lies in controlling your breath. The key here is to hold in as much air as possible when you articulate. The more control you exert over your breath during tonguing, the more precision and focus you can achieve in your sound. This results in a cleaner and clearer tone, as opposed to a vague dispersion of air.
- Monitor Your Stomach
To gauge your progress, you can use a simple exercise involving the observation of your stomach. If you notice your stomach contracting with each articulation, it’s a telltale sign that you’re releasing too much air. Using a mirror to keep an eye on your stomach and practicing to maintain a steady position will help you achieve a more focused and controlled sound.
- Practical Articulation Exercises
Practical exercises play a crucial role in your journey toward mastering articulation. For instance, pieces that involve a lot of tonguing, such as the Bach E-flat Sonatas, provide a perfect challenge. Focus on holding in as much air as possible while maintaining a precise “tah.”
- The Ultimate Goal: A Focused Tone
In the end, our objective is to achieve a focused tone that is free from excess air. With practice and control over your breath, you can ensure that your performance is characterized by a clear, rich sound.
In conclusion, I’ve found that paying attention to these aspects of flute articulation has significantly improved my playing. Whether you’re a beginner starting your musical journey or an intermediate flutist looking to enhance your skills, I encourage you to follow these guidelines. With consistent practice and a focus on your “tah” when you articulate, you can achieve better results in your flute playing.
Have fun!
DoctorFlute
*This blog article was edited by ChatGPT. What do you think?
Watch me demonstrate this:
In this video I discuss the exact position of the tongue necessary for a good clear Tah using embouchure, tongue, and support.
Let’s Talk Articulation – Focus on Your Tah – FluteTips 179

Practice Articulation to Improve Your Tone – FluteTips 155
FluteTips 38 Practicing Articulation

FluteTips 1 Articulation Tonguing Too Far Back

The post Flute Articulation – Focus on Your Tah appeared first on DoctorFlute.
]]>The post Resonate to Improve Your Tone appeared first on DoctorFlute.
]]>When we think about our flute sound resonating, we are talking making a tone that is vibrant and alive. When you use resonation to improve your tone, you will be surprised at how much you like it! A tone that resonates will make people stand up and take notice.
There are 3 places or ways to make our tone resonate. The first way is that we want our sound to resonate through our flute. The second place is we want our tone to resonate in our sinus cavity. The third place we want to resonate is through our body. And we want everything in our body to work towards getting that resonation.
Think about your favorite flutists and how they sound. They achieve that beautiful tone because they are resonating in these three areas.
Our Flute
It is very important for you to have the instrument that will do it for you. If you have a beginner instrument, you could still get a good tone. I have had many students who still get a really nice tone on a beginner instrument. But in the end, there is a limited amount of resonating that you can achieve on a silver-plated nickel instrument, if that’s your beginner instrument.
So, it might be time for you to upgrade if you have that beginner instrument and you’re really looking to get that tone, because who doesn’t want to practice more if you’re sounding really good? At minimum, make sure your instrument is in good shape, has had a clean-oil-adjust, and no pads are leaking.
While I’m not talking about embouchure and how you must put that in the right place and have the right shape embouchure on your lip plate. While that is important, we are just discussing resonating today.
Our Sinuses
How do you resonate in your sinus cavity? The main point of resonating in your sinus cavity is to open the back of your throat. Some of you can just do it when told. You just read it, tried it, and it worked. That is great!
But for the rest of us, here are some pointers. First think about what happens to your throat when you yawn. Go ahead, take a yawning breath. Feel how that opens up your throat. You want your throat to just open right up like that when you play. You want to feel that there are no restrictions that are going to inhibit the tone. You want to have that resonating sound echo through your sinus cavity. It can resonate when you keep your throat open.
Now, one of the ways for it to resonate in your sinus cavity is to make sure the back of your tongue is down and your soft palate is up. Practice yawning again and feel the back of your tongue pressing down; and feel the open space as your soft pallet goes up. When you yawn like this you create an open space in your sinus cavity for your sound to resonate. This is why I encourage my students to “take a yawning breath” because it opens up sinuses.
Now, if you are not thinking about this and working at it, it is very easy to close off your sinus cavity, which limits your resonation. So be sure that you are thinking about that tongue being down in the back, that your soft pallet staying up, and that when you take that breath, it just fills it right up.
Our Body
Now let’s talk about the third place for resonating, and that is through your body. So, when I breathe, I expand my rib cage and expand my stomach at the same time. Plus, when I take that yawning breath and I open my throat, all of a sudden when I am playing, that sound can resonate through my body from the floor all the way up to my sinus cavity.
So, I will stand not with my feet right together, but I’m a little bit firmer of a stance, having my feet a little bit apart. So, I’m very solid. I feel very grounded from the floor all the way up into this sinus cavity. It is all open because I put my whole body into it.
Now, for me, I know I am pretty good at this, but I will let the back of my throat close off. So, I must concentrate on that. I focus on it. I can hear the sound close off when the back of my throat closes. And I can hear my sound resonate more when I open it back up. You too may have something to focus on to achieve a resonant tone.
First, you want it to resonate through your instrument. So, make sure that your instrument is in good working condition. Upgrade if it is time to upgrade.
Second, the back of your tongue is down, your throat is open, and your sinus cavities are open.
Third, let the sound resonate through your body, all the way up into your sinus cavity through that nice hollow tube you have just created by expanding that rib cage, taking yawning breath, and opening your throat wide open.
Try that. Experiment with these areas and see if you can get that rich, warm, resonating tone that you are looking for.
Have fun!
DoctorFlute
Watch me demonstrate this:
Resonate to Improve Your Tone – FluteTips 178

You Can’t Have a Good High Register Without Having a Really Good Low Register – FluteTips 172

Getting Spin on Your Third Octave Notes – FluteTips 171
FluteTips 69 Playing Flat Scales to Expand Your Tone

Putting Air in Your Cheeks to Lower Your Pitch – FluteTips 32

The post Resonate to Improve Your Tone appeared first on DoctorFlute.
]]>The post Experiment with Your Tone appeared first on DoctorFlute.
]]>Even when I am in good shape from a steady diet of practice, rehearsals, and performances, I can still have a bad tone day.
So what can we do to pull out of the doldrums and make it a good tone day? I remember during my college years when I had bad tone days, all I did was technique. Just the thought of doing long tones turned my stomach! Working on technique was my fallback practice.
Well, I’ve learned a few things since then, and I think that we can sound good every day, all the time. Even when you are tired, or distracted, or just mentally tuned out. Back then when I caught a cold, it felt like my tone caught the cold as well.
If you ever tried to exercise when you’re just so tired, you find that you can do it. And it’s good to plow through exercise even when you’re tired. But your muscles don’t respond in the way that you want them to. And you really have to say, you know what? I’ve got to do it anyway.
So, here’s how you experiment to fix your tone while you are working on your technique.
Pull out your chromatics from Taffanel and Gaubert Number 5.
#1 Lip Pressure
For me one of the first things that happens when I am having a bad tone day is that I apply too much pressure with my flute against my lip.
This of course will also give you some intonation issues. Usually, you’re flat when you do that. So the first thing I’m going do is play my groups of six, and lighten up that pressure. Because I can do it while I’m playing. Don’t worry if you are a little bit uneven in there. Just concentrate on decreasing that lip pressure.
#2 Angle of Airstream
The next thing to think about is the angle that you are blowing across the embouchure hole in the lip plate. So, you want to experiment with that.
And you can take your exercises, whatever you’re doing, and just take them out of a rhythmic context and just make your fingers move. But think about what you can do here to find the right angle to blow the air across.
#3 Relax Embouchure
Sometimes, probably all the time, when I feel like I have a bad tone day, it is because I am way too tight in my embouchure. That may be the case for you too. So, I am going to concentrate on loosening that up.
Now of course you still must maintain your support – your pressure. But if you work on these three issues, I think that it will make a big difference in your tone. And they’ll change your tone right now as you’re playing. And you can even do it while you’re doing your technique.
Once you have worked on these three, next add articulation. Because if you can make a good tone on that tiny little punch of articulation, then you know you are on your way to a better tone day.
Have fun!
DoctorFlute
Watch me demonstrate this:
Experimenting with Tone – FluteTips 176
Getting a Better Tone Quality on Your Middle Notes C C# D Eb – FluteTips 161
Finding Your Tone with a New Headjoint – FluteTips 158
Get a Better Tone on Your C, C#, D, and Eb – FluteTips 187
Practice Articulation to Improve Your Tone – FluteTips 155
The post Experiment with Your Tone appeared first on DoctorFlute.
]]>The post Trill Fingers appeared first on DoctorFlute.
]]>Move Your Fingers Up
We have three trill keys down here in our right hand, and each of those trill keys needs to be played with a different finger. So, when you are doing your trills, you need to move your finger up to the trill key.
When I first started learning flute, I moved my first finger up to the trill key and down to the trill key! Of course, for a long time, I did not even know what I would move my first finger up for. What was that key even used for?
But that is not a great pattern because that one finger has got enough to do. He has his own key and a trill. It is too much to ask him to play a third key.
Each Trill Has It’s Own Finger
So, we want to move up to trills. If we move up to trills, each finger has its own trill. Additionally, that gives each finger a chance to exercise its muscle.
I really think that you need to work on trills, not just for the fact that you are going to trill and that each time we trill we have to do it a little bit differently. But because when you work on trills, you work on weak fingers and their muscle control.
You know what I mean – when you trill with a weaker finger, that trilling is just not fantastic. So, the more you work on it with that finger, the stronger that muscle gets, and the better that trill sounds.
Plus, that finger then works better in all your technical exercises as well. So, it is going to be doubly beneficial for you to work on your trills.
Exercise the Weak Fingers
For example, our middle finger, our E finger is often fast enough. But he is often just inconsistent when trilling. It is similar with the first finger, where you use the side of your finger to trill. And remember that when you move up to this trill with your first finger, you do not play it with your fingertip. You could, but it is really awkward to move your whole entire hand to do this. So, you, you just use whatever side of your finger reaches over there and hits that trill key. That part of your finger is what you use to trill. There is no right or wrong as to what part of your finger that you use. You just do not want to bend your finger. If you bend your finger to use your fingertip, you have to move your entire hand up here to do that. And it is okay when you trill to get off the pinky key, your E-flat pinky, that is fine.
But when you work on your trills, you get your uncoordinated fingers to have a chance at trilling.
You Can Learn This
But you want to work on trills, you want to practice trills, and you want to move up to your trills. You can break old habits. You can change. I was probably in college when I learned this method of trilling. But I learned it. So, anybody can learn to do this. It just takes a little bit of thought to move up to the trills. Moving up to trills will make a lot of sense to you once you learn to do it.
This is something that is accessible. You can do this.
So, work on your trills, your fingers will be glad, your technique will be glad, and your trills will be phenomenal.
Have fun!
DoctorFlute
Watch me demonstrate this:


FluteTips 49 Every Trill Has its Own Finger

The post Trill Fingers appeared first on DoctorFlute.
]]>The post You Can’t Have a Good High Register Without Having a Really Good Low Register appeared first on DoctorFlute.
]]>There are some things that you can do to work on your low register and know that that is also helping your high register. Now, that does not mean that you can stop work at anything in the high register because your low register was nice and rich. You still need to be thinking about how you are playing and how your low register reaches that upper register, and even just taking the high register out all on its own.
Round & Full
But let’s just talk about the low register. So, what are some things that you can do to fill it out, to make it strong? Long tones, of course, down in that low register, just doing from B down to low C is a really good place to get started for building your low register. And what you are thinking about is how round and full can you make this low register. You are not thinking about playing softly. You want to fill it out, to make that low note really round.
You also want to think about:
The shape of your embouchure
Opening your jaw wider
Putting air in your cheeks
These are things that will help you make it rich and resonant and full.
You also want the sound to come from behind your sinus cavity. So, the back of your tongue should be down, and the roof of your mouth is arched up. This is how singers have the sound resonate. And then that sound can be rich and full all the way down.
Low to Middle to High
Now, if that is tenuous or if you crack a lot, or if it just does not stay there, you know that there is probably going to be something that is affected above it because that roundness, that fullness, that resonance can move into your upper register. This is why when you do long tones for the third octave, we actually start on middle B and we go up instead of always descending. Because if you can get a round full low register, then middle, then do long tones going up.
So, you keep what is full in the low, move it to the middle, and then take it higher.
Keep it really full. You are not trying to play really softly. There is a time and a place for doing your long tones with diminuendo and trying to play really softly. But right now you are not trying to do that. You are trying to get your high register to be rich and full and beautiful, just like your low register. So, you are going to work from a low note to a middle note as in those octave slurs, and then work to keep that resonance all the way up.
If you start with a good low note, you can match those registers and it becomes a beautiful sound that you can work with and build on all the way up.
A Word on Hearing Loss
If you are going to work your long tones in your third octave, wear ear protection so it does not damage your ears. You can just use those foamy things if you do not have real kind that allow sound in, but keep out the higher harmonics. If I am going to work in the third octave, I usually wear ear protection same as if I am playing piccolo.
So that is how you can fill out and strengthen and make your third octave be so much more resonant and beautiful. You start with a low register that is fabulous. That is the foundation that pushes up and holds up that third octave. Then you can make it just as glorious as your low register.
Have fun!
DoctorFlute
Watch me demonstrate this:
You Can’t Have a Good High Register Without Having a Really Good Low Register – FluteTips 172

Getting Spin on Your Third Octave Notes – FluteTips 171
Putting Air in Your Cheeks to Lower Your Pitch – FluteTips 32
Resonate to Improve Your Tone – FluteTips 178
The post You Can’t Have a Good High Register Without Having a Really Good Low Register appeared first on DoctorFlute.
]]>