How to form the right flute embouchure for you is a question that you need to answer! A great embouchure is the way that you can sound your best. It is the only way to get a good tone.
We can work on technique and get our fingers to move as fast as they can move. But if sounding good (which is the reason you are playing flute to begin with), if getting a good tone is elusive, finding the right embouchure is the solution you are looking for.
Now I have videos on opening your embouchure and having a relaxed embouchure. And you can watch those, but let’s get a little bit more basic today.
The first thing that you want to do is line up this embouchure hole with the keys. People have different ideas about this lineup here and there are professionals out there that have different ideas about how to do this. One of my favorite flute teachers that really got me on the path to where I needed to go, her name was Georgetta Maiolo, loved that teacher. She played with this flute headjoint rolled in a little bit more than I now recommend. You can get a good tone in different ways. But I think the best place to start is to just put it in line. So, you look down your flute and line up the center of the embouchure hole with the center of the keys. Start there.
If you have offset G, (I do not have offset G) sometimes that lineup can be a little tricky. You are not looking to line up the embouchure hole with the offset keys. You are looking to line up with the first 3 keys, and then the keys down on the end. So, it is just a straight line.
Next, we look at how much of the embouchure hole should you cover with your lip. Obviously, this will vary based on the size of your lips. We all have different size lips. So, will be slightly different for every flutist. So, what works for me, and how much I cover will be somewhat different than what works for your, because I have a little bit thicker of a lower lip. But this approach still works even if you have very thin lips. We can still approximate where it should go.
When I start beginners, I start them putting the center of that embouchure hole, right in the middle of the lips. I have them close the lips and then they place that hole right in the middle of their lips. Then once there, we are going to roll it down. That is a good place to start.
Now from there, I am going to adjust it. So, when I do that, I can tell, because I know how I like to have my embouchure hole, it is a little bit high. So now I am going to move it, for me, I like it a little bit lower. I get the best tone there. Now what you are going to do is probably you want to use the mirror because this is what is going to be the key. You can read books that definitely have different ideas about how much to cover. I think that you want to cover maybe two thirds. About two thirds of that embouchure hole.
But the key here is using the mirror. Because if you are looking in the mirror and you see almost the entire hole in the mirror. You probably rolled out too far. So, that means you are going to need to bring it in a little bit.
So far, we have not moved it up or down on the lip. It is just where it is when you rolled down from the center of your lip. That is okay, we will worry about that in a second. So, you are rolling down and you’re looking in the mirror. What I want to see in the mirror is a little bit of this outer edge. I want to be able to see that edge and maybe a little bit of the hole. And if I do, can you see a little bit of that hole there? I hope so. That is when I look in the mirror and I see that, I know that that is the right spot.
So, when I have students that I have them use a mirror, right when they are in lessons with me, so they can go home and look in the mirror and see what I am seeing. I want to see a little bit of that outer edge. We call it the strike edge because that is where your air strikes first. And you want to see just a tiny bit of the curvature. If you see too much or you do not see any, you are probably rolled in too much. So, We start with that.
Now let’s determine, so we’ve got the right amount of coverage, that means how much this is covering. And again, we all have different lips so, it’s going to be slightly different with the thickness. But also now we’re going to move it up or down. If you have very thin lips, your spot is going to be a little bit different than someone with a very thick lower lip. So, I will move it down until I feel like it’s right on the edge of the lip. That is, I move it down until I go down too far to get a good sound. It is very airy there because it is not the right spot for me. This is an experiment. Move it up and down to find the right spot for your lips.
When you put your flute up to play, just because it lands on your lips where you usually play, that does not mean it is permanently there in that spot! On moving it down and now, I want to move it down or up until I feel like, okay, there was a good tone and now I have lost the tone again. If you are down to far, experiment with moving it up. That embouchure hole here is not set in stone.
I have definitely had students where I move it up onto the red part of their lip. But that is a good spot for them, because of the way their lips are formed. And that is a good spot for them when they tongue any notes.
The C Chromatic Tonguing Exercise is a good exercise to help you figure out where the best part on your lip to place the embouchure hole. I have talked about the C Chromatic Tonguing Exercise in other videos. It is an exercise where you stay on C and you are going down chromatically.
So, when you are experimenting with your embouchure, to get the tone you want, take a look at how you’re putting this tone hole on your lip. Is it too high? Is it too low? Are you rolled out too far? Are you rolled into far? All those are factors in getting you the tone that you are looking for. So, experiment with that. When you are forming that flute embouchure, whether you have a beginner flute, you have an intermediate flute, or even if you’ve moved up to the professional level flute, we can all work on our embouchure and our tone. I have changed where my lip is on this tone hole, even, probably in the last two years. And I get a different tone because I was looking for something different and I was not getting it. And so, I experimented with my embouchure and now I like what I’m getting here.
So, it is all about where you put it on your lip, how much your rolled out or rolled in. Just those two things make a world of difference, and you need to feel free to move it around. Do not leave it in one spot. Then there is all these other factors that I’ve talked about in other videos, opening of your teeth, opening up your lips, keeping your embouchure relaxed. That is a more complicated issue. But your first steps are to see, how are you forming that embouchure. Are you moving it down or is it up too high? Is it too low?
Do not be caught up where it is. But think about the sound you are getting, the sound will tell you where you should have it and how much you should cover when you are rolling it out or rolling it in, tongue that a couple times. I can get all sorts of different sounds. And one sounded really good. My ears going to tell me that is where the embouchure needs to be. All right, you experiment with that, but use the mirror because that is your best friend in telling you where that embouchure should be. And then when you have got that figured out and you feel like you’re getting that right tone, then go onto my other videos about teeth spacing and relaxed embouchure and add that. And you will be well on your way to getting the tone you are looking for.
Have fun!
Doctor Flute
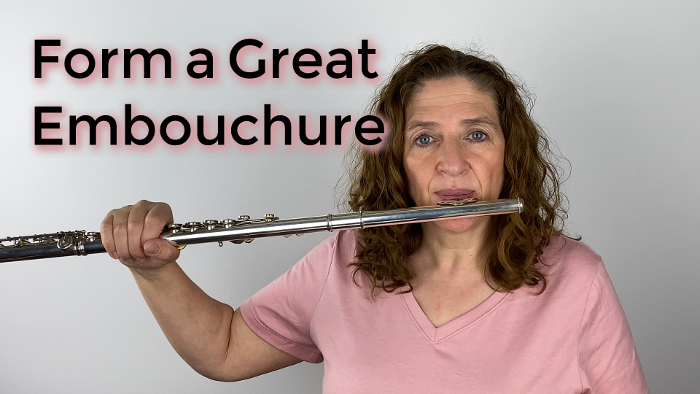
Watch my video as I explain how to form a great embouchure.
How to Form a Great Flute Embouchure – FluteTips 132


How Not to Crack on Your Middle Register Notes – FluteTips 164

Making Your Embouchure Be Flexible While You’re Playing

