The post Trill Fingers appeared first on DoctorFlute.
]]>Move Your Fingers Up
We have three trill keys down here in our right hand, and each of those trill keys needs to be played with a different finger. So, when you are doing your trills, you need to move your finger up to the trill key.
When I first started learning flute, I moved my first finger up to the trill key and down to the trill key! Of course, for a long time, I did not even know what I would move my first finger up for. What was that key even used for?
But that is not a great pattern because that one finger has got enough to do. He has his own key and a trill. It is too much to ask him to play a third key.
Each Trill Has It’s Own Finger
So, we want to move up to trills. If we move up to trills, each finger has its own trill. Additionally, that gives each finger a chance to exercise its muscle.
I really think that you need to work on trills, not just for the fact that you are going to trill and that each time we trill we have to do it a little bit differently. But because when you work on trills, you work on weak fingers and their muscle control.
You know what I mean – when you trill with a weaker finger, that trilling is just not fantastic. So, the more you work on it with that finger, the stronger that muscle gets, and the better that trill sounds.
Plus, that finger then works better in all your technical exercises as well. So, it is going to be doubly beneficial for you to work on your trills.
Exercise the Weak Fingers
For example, our middle finger, our E finger is often fast enough. But he is often just inconsistent when trilling. It is similar with the first finger, where you use the side of your finger to trill. And remember that when you move up to this trill with your first finger, you do not play it with your fingertip. You could, but it is really awkward to move your whole entire hand to do this. So, you, you just use whatever side of your finger reaches over there and hits that trill key. That part of your finger is what you use to trill. There is no right or wrong as to what part of your finger that you use. You just do not want to bend your finger. If you bend your finger to use your fingertip, you have to move your entire hand up here to do that. And it is okay when you trill to get off the pinky key, your E-flat pinky, that is fine.
But when you work on your trills, you get your uncoordinated fingers to have a chance at trilling.
You Can Learn This
But you want to work on trills, you want to practice trills, and you want to move up to your trills. You can break old habits. You can change. I was probably in college when I learned this method of trilling. But I learned it. So, anybody can learn to do this. It just takes a little bit of thought to move up to the trills. Moving up to trills will make a lot of sense to you once you learn to do it.
This is something that is accessible. You can do this.
So, work on your trills, your fingers will be glad, your technique will be glad, and your trills will be phenomenal.
Have fun!
DoctorFlute
Watch me demonstrate this:

FluteTips 49 Every Trill Has its Own Finger

The post Trill Fingers appeared first on DoctorFlute.
]]>The post Fixing the D to E Glitch appeared first on DoctorFlute.
]]>D to E 4th Finger
In order to fix this glitch, you need to create an exercise for yourself. Play (high) D E F D nice and slowly. Do you hear any glitches or pops (when your fingers make a popping noise when they come down on the keys)? If so, we’ve got something to work on. If not, then increase speed slightly and listen again. I guarantee that you will hear a glitch at some point. Remember the faster you go the more you hide these problematic areas.
This D to E is really on the tricky side. Fourth fingers are notoriously weak, and because they’re weak, when we have to move one or both of them up or down, they can be a little slower than the other fingers.
Brain Power
The key to working on these fingers and these glitches is really brain power. You have to think your way through them. My ear has to be intently listening to what I hear and analyzing what is happening. I have to analyze what fingers are late, what fingers don’t go up or down at the exact time. When I know what is happening then I concentrate on moving those particular fingers very precisely. It takes time and effort and can be very tedious, but it works.
It is amazing that the more you think the better these get. You can make those muscles work better. You can make that finger go down or lift up at the same time that another finger does the opposite. Thinking your way through makes it happen.
You Can Fix This
If you hear a pop sound when the fingers go down or lift up, then that can be cured by thinking about how gently or quickly you put down/lift up your fingers. Or it’s possible that you slam your fingers on the keys. If you are one of those people that play with a heavy hand then you need to learn how to place quickly but gently. It’s amazing how much that can help.
I have to say that this is why a professional model flute is so phenomenal. Professional model flutes are not always all about the tone. They do offer a great tone but also, it’s about the finger action. When you have a handmade flute the finger action is just phenomenal. If you have a step-up instrument you can still work on glitches, but a professional model flute will make it just that much easier.
Makeup any kind of movement between notes that will create a difficult finger problem. Add some bigger jumps and work on those as well.
Carry Over
This is very, very tedious kind of work. I remember I had a teacher that gave me a whole bunch of patterns to work on with these glitches. I thought I was going to die when I worked on them. But the dividends they paid were amazing. Sometimes when you work on a run or some difficult part of your solo, it helps your fingers and your muscles altogether. But a lot of times it really helps only that passage. When you work on glitches, you’re working on that muscle control, and it carries over to everything that you do. It’s a really good exercise. So, the dividends are big, they pay off.
Work on these glitches. It will be great for your technique and your muscle control. It’s hard work but it will pay off.
Have fun!
DoctorFlute
Watch me demonstrate this idea:
Fixing the D to E Glitch – FluteTips 160

Practicing with Reichert’s Seven Daily Exercises Opus 5 – FluteTips 85

The post Fixing the D to E Glitch appeared first on DoctorFlute.
]]>The post 30-Minute Practice Session Using Mozart Concerto in G appeared first on DoctorFlute.
]]>It does take a little bit of creative work. But it can be done. The benefit you gain is that you are learning your solo while you are practicing.
Technique
I am going to begin with technique which means scales and arpeggios. Guess what? Mozart concertos are chuck full of scales and arpeggios. To begin, notice that this concerto is in G. That means I will begin by playing my G major scale, I want to know the G major arpeggio, and I want to play the G major scale in thirds.
Play though your G major scales then play it in 3rds. Then play the G major arpeggio. Get comfortable with the scale in 3rds it’s a great way to practice you scales. Play these until you whip up and down the scales like no bodies business. Additionally, play the D scale 3rds and arpeggios. Because on close inspection, there are places where Mozart moves to the dominant key of D major.
This G major concerto, as in many classical pieces and concertos like this one, is largely based on scales, arpeggios, and scales in thirds. So, if you know those cold, so much technique will be easy for you.
After I’m done playing scales and arpeggios, I will look in the concerto itself and find scales passages or arpeggios in the music. Take a couple sections at a time and work on the scale patterns Mozart uses. Put your metronome on and make sure you are even. Sometimes the scales aren’t just straight up and down. But you are looking for sections of adjacent notes. When you have those under your fingers, find another couple sections and work on those. After that, do the same with arpeggios. Mozart uses arpeggios.
This is the approach for technique. I’m sure you can see where I’m going with this and you can easily apply it to your own practice.
Tone
You are now warmed up after all those scales and arpeggios. Now it is time to work on your tone. So, let's look at the second movement. We'll do a couple of things with practicing tone at the same time as your solo because we've only got 30 minutes. So, let's look at the solo in your second movement. It's a gorgeous movement that you can use for tone practice. Let’s begin by taking out the first five notes to use as a tone exercise.
First, I’ll take that A at the beginning and play it until I get the tone that I want. Then I move to all 5 notes to play very slowly compared to how I would normally play it. Am I smooth? Are there any glitches? How is my vibrato? Am I tapering at the end? How is my vibrato going through that taper? Am I keeping my embouchure open so that the tone sounds mellifluous and beautiful? Now perhaps I will move on to the next group of notes and do the same thing.
Flexibility/Articulation
Now, another thing that I like to do when I'm doing a 30-minute practice time using a solo such as this Mozart Concerto in G is to work on my articulation and my embouchure movement.
So, we've covered technique. We've covered tone. Now let's do some articulation because we need to practice articulation and embouchure flexibility. In the first movement there are some great spots where Mozart wrote articulated octaves. He wrote then in 8ths, triplets, and 16th notes. These are great spots to work on that embouchure and its flexibility. Take those sections out of context. Play them with the best tone and do the octave jumps maintaining that sound. Work on short crisp articulations at the same time.
Etude
This entire concerto can be considered an etude. Etudes usually work on a specific area. And this concerto does the same thing. Using all the 16th note passages and practicing with the metronome, and using lots of different articulations is exactly what you would do in an etude. Once done you put those passages back into context and work on the musical line and phrasing.
Solo
Well now you can finally work on all the little spots that didn’t fit in with your other categories. Here is where you play a section and listen for continuity and other spots that need work. But you know what? All that other work pays off here.
So that's my advice. If you have a very difficult time eking out that practice time, try this method. Use your solo, use it wisely. You can learn your solo and improve all skill areas at the same time!
Have fun!
DoctorFlute
Watch me demonstrate this: 30-Minute Practice Session Using Mozart Concerto in G - FluteTips 134
What to Do in a 30-Minute Practice Session - FluteTips 119
How to Warm Up in 15 Minutes – FluteTips 152
Using Your Practice Time Wisely – FluteTips 156
The post 30-Minute Practice Session Using Mozart Concerto in G appeared first on DoctorFlute.
]]>The post Playing Köhler’s Virtuosic Etudes Opus 75 appeared first on DoctorFlute.
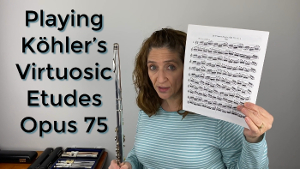
]]>The Virtuosic Etudes are in fact virtuosic. At first glance, they do look a little bit scary. They are multiple pages long and very dense with notes. It just looks like a Köhler bled black all over the page and decided to make life difficult for the flute player. However, they do fit your fingers. That is, there aren’t any really odd or strange intervals such as the JeanJean studies. I wouldn't say the JeanJean studies are odd or strange. But they are different types of intervals and passages which don't fit your fingers.
Köhler's Virtuosic Etudes do fit your fingers. They're fantastic for making your fingers really move. Once you've worked on your technique by doing your scales such as the Taffanel and Gaubert scales or Reichert studies, it might be time to try these etudes. They will compliment the techniques that you're working on. It will be a natural flow to move from scale and arpeggio work to the Virtuosic Etudes.
If you would like to work on these then go to my website, DoctorFlute.com/downloads to download these etudes and start working on them immediately. They're fantastic. They're strong. They're not for the faint of heart. If you are scared by all the black, then don't start with these begin with something a little less black, then work your way here. But if you look at it and say, that's a challenge and I'm going to do it. Then these etudes are for you! Because you'll reap a lot of benefit from them. Keep in mind that they are not Anderson etudes where the melody shines through the melodic line amidst a lot of technique. There is phrasing and cadences to make these etudes musical as well as technical.
These etudes offer a challenge for anyone wanting to work on their technique with scales and arpeggios. They are well worth your time and effort for what they can teach your fingers. So, go to my website, download these etudes. You'll enjoy working on Köhler's Virtuosic Etudes, and then you can tell yourself that you're a virtuoso as well.
Have Fun!
DoctorFlute
Watch me demonstrate this: FluteTips 99 Playing Köhler’s Virtuosic Etudes Opus 75

Practice with Me Dolls Waltz Köhler 25 Romantic Etudes Op 66 No 2

Everything I Learned About Music I Learned in a Etude!

FluteTips 14 Practicing Etudes

The post Playing Köhler’s Virtuosic Etudes Opus 75 appeared first on DoctorFlute.
]]>The post Are You Rushing? Here’s How to Fix it! appeared first on DoctorFlute.
]]>Rushing is something to be conquered in order for a solo to sound spectacular with runs that glisten with ease. You can conquer this beast but it takes effort and sometime blood sweat and tears.
Your metronome is your best friend. When it comes to rushing. It is going to hold that beat for you and make sure that you are steady. There are very few of us that have such an internal beat that you can keep that beat steady no matter what your fingers are doing. Generally, we change the beat to fit the fingers. Turning the metronome on ensures that your beat isn't going to waver. Find a beat that allows you to play the run or passage perfectly without rushing. If you can play it perfectly without rushing that's where you start.
We definitely have fingers that the muscles are really responsive and other ones where the muscles are not as responsive. When we work on a passage, what we're really doing is teaching all those muscles to work equally. We need to make them all be even and be at our command rather than them doing their own thing, which is what's happening when they're rushing.
After that tempo is learned I will advance the metronome to stretch my fingers but not crash and burn. You can use the same rhythm changes at this tempo. I also like to switch up the articulation. Tonguing (or double tonguing) is my favorite thing to do with fast passages. I feel that putting a tongue on each note helps register that note in my brain. But, I will use every articulation I know for the passage.
When I use this method of muscle training, what happens is that my eyes see different things than they saw the first dozen times I practiced it. Our eyes don't see and our brain doesn't register all those notes in a passage. When you articulate differently, you make your fingers and your eyes see something they didn't know before and therefore you learn it better and you learn it stronger.
Sometimes a rushed passage is just a matter of missing a note that was tucked inside.
The next step is to change the rhythm. It can be crazy to change the rhythm but it is quite effective. If you take a group of 16th notes and make them into triplets that can throw your whole idea of the passage into something brand new. Triplets can become duplets. Irregular groupings can turn into regular groupings of 2/3/4's. Try it!
Another fun thing to try is to play the passage forward and backward. Begin with whatever articulation or rhythm you are using and once you get to the end of the run turn around and play it backwards. I'm not sure what makes this work but it does. Once again it might be because your brain registers notes that it didn't see before. If you haven't done it before, it can get a bit tricky the first time especially because you don't see the accidentals ahead of time.
When you are changing articulation and rhythm don't get caught up with the fact that they don't always work beautifully because of repeated notes or rests. Adapt the passage to what you are doing it will still work. When I've was doing, Chant de Linos by Jolivet, I remember working on some of these really difficult passages with these runs that didn't fit in my fingers. They don't fit into our usual conception of scales and arpeggios. They were made up of skips and intervals that I wasn't used to playing. Using this method to practice definitely made me see notes that I hadn't comprehended initially. It saved my hide when it came to learning this piece.
After you've been doing it with that tempo, make your metronome go a little bit faster and repeat everything you've done so far. It's a slow way of getting your passage learned, but it's the strongest way I know to get even, clear passages without rushing. As I always say, slow gets you faster, faster. That's my motto! It works and it works every. single. time. There's not a single time where this method doesn't work.
Check out your passages, see where you're rushing. Take out your metronome, use different articulations and different rhythms, but always make sure you're at a tempo that you can achieve this and then move it a little bit faster.
Have fun working on your passages where you're rushing and get them to not rush.
DoctorFlute
Watch my video of this: FluteTips 96 Are You Rushing Here’s How to Fix it
The post Are You Rushing? Here’s How to Fix it! appeared first on DoctorFlute.
]]>The post Marcel Moyse Scales and Arpeggios appeared first on DoctorFlute.
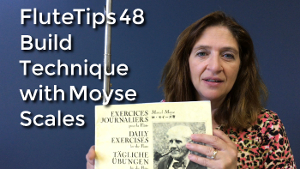
]]>I stumbled upon this book one year at a flute convention in my grad school days. I'd been using my technique books: Taffanel and Gaubert's 17 Grand Exercises for the Flute and Marcel Moyes's book Daily Exercises for a long time. They're good books from which I learned a lot. However, I knew I needed something else to practice.
But I wasn’t looking for just another technique book!
I wanted something else. Something that was not merely scales, but offered more variety and interaction with the keys. So, I bought this book on a whim and have since fallen in love with this book.
If you don't have it, you need to go out and get it because it is a fantastic book. It gives you so much variety covering all the different keys with such a variety in scales and arpeggios in such an interesting way that I never ever get bored with this practice book.
This book is even put together in a different way too. You can go through and play the exercises page by page, or you can follow the schedule written inside the first page. There is no set way to use this plan. But if you follow across the top line, the exercises performed will continue in a similar key structure - but with amazing variety.
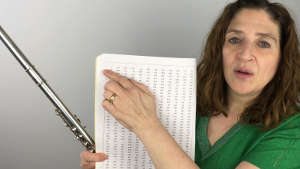
I love playing across this schedule. I don't have to stay with one so long that I'm bored with it. I can play one exercise as many times as I want, then continue on to the next one. My plan is to play one line of these exercises for a week. I will play all the exercise across the line each time I practice. Then the next week, I will move down to the next line. If you were to look at my book you would see that I have some arrows pointing to each line which are put there for me to keep track of the exact line I'm working on for that week. At first you think it's easy to keep track of what line your are on but 10 weeks in you will be asking yourself which line you played last!
This book will change your practice!
Some of the exercises in this book are very difficult and they cause any number of problems. This makes me hate working on it! But then again I love working on it! Because it helps my fingers in some way that I didn't know I was having problems with.
At some point, when I've learned it well enough, I will put a metronome on and see if I can maintain the tempo. Let me tell you that if you put a metronome on and try do all the exercises in the row at that tempo it is a challenge! Some of these exercises can really make your fingers work.
Go get to this book, try working all the way through the schedule following a line at a time for a week before you move on to the next one. See if you feel the changes that will make your fingers move better, train your muscles, and help your sight reading reading.
I think you'll enjoy working on these exercises. It will give you variety from your normal routine.
This book will change your practice!
DoctorFlute
Watch my video explaining this: FluteTips 95 Marcel Moyse Scales and Arpeggios

FluteTips 72 Rich Expansive Low Register
FluteTips 53 Moyse Short Tones
FluteTips 48 Building Your Technique by Practicing Moyse Scales
Practice with Me Moyse Short Tones
The post Marcel Moyse Scales and Arpeggios appeared first on DoctorFlute.
]]>The post Taking a Quick Breath Quietly with Relaxed Throat & Jaw appeared first on DoctorFlute.
]]>Sure, we all know how to take fast breaths when we exercise. But when you’re playing through a fast passage, and you need to breathe while in tempo, you’ve got to learn how to do it quickly AND quietly.
Here’s a way to train yourself to relax your throat and jaw, so that you can easily breathe quickly and quietly.
The biggest mistake we make is keeping the throat tight. When we take a fast breath, our instinct is to just suck in the air we need while keeping a tight jaw and a tight throat.
This produces a noisy breath. It makes a sound. A sound that we probably don't want in the middle of a piece. Once when I went to a flute convention, I heard Trevor Wye talk about all these competitive performers who we're not thinking about the noise they made with their breaths. He was actually complaining about how much it bothered him.
It made me start thinking about my breaths. Were they noisy when I played? I wasn't even sure. I began to listen to myself and thought that I was fine. Then I heard a recording of myself in a performance and was shocked to hear the sounds my breath made. I realized my throat and jaw were tight and those quick breaths were louder than I imagined!
Generally, when you take a fast breath in the middle of a piece, the vast majority of flutists take it with a tight jaw and closed throat. The spontaneous breath is closed and tight. Thus, the right method of breathing has to be well thought out and practiced just like everything else in music. It will take intentional thought to breathe properly.
When I want to work on breathing, I pick a passage from what I'm working on and I practice taking a proper fast breath with an open throat and relaxed jaw. If I play at the speed required for the piece and take a breath I will undoubtedly do it wrong. So, instead when I need a breath, I stop completely and open my throat which automatically relaxes my jaw. By practicing this breathing technique while I'm practicing a piece, I learn to take this kind of breath every time
Every time an intentional breath. Every time.
It's amazing that all you really have to do is relax the throat and breathe to do it quietly. And not only is it quiet, but just as fast too.
Now, experiment with this practice technique. Experiment with taking those fast breaths, but do it from a complete stop. Fill up, and then resume at the tempo in which you ended. This is a way to practice breathing correctly and a way to train yourself to take that kind of breath every time.
Add this to your practice routine. You'll be glad that you did because a quick breath can open that throat up and relax the jaw. It's quick, it's quiet, and it will give you a better tone when you come back in.
Have fun!
DoctorFlute
Watch me demonstrate this FluteTips 83 Taking a Quick Breath Quietly with Relaxed Throat & Jaw
The post Taking a Quick Breath Quietly with Relaxed Throat & Jaw appeared first on DoctorFlute.
]]>The post Practicing Triplet Scales appeared first on DoctorFlute.
]]>When I practice triplet scales I play through all of them. I begin with C, and travel the circle of 5ths. When you know these scales really well, you can play them at a good clip. So, it doesn’t really take too terribly long to play them all. I find them quite fun.
Triplet Scales add variety to my practice.
They are fantastic for making the fingers move.
Practicing triplet scales will help you to increase your muscle control.
These scales will be fantastic to help in sight reading as they go through every major key and every minor key including all 3 types of minors.
These scales can help tone development as you should be thinking about your embouchure changes as you traverse the octaves.
If you haven’t started with triplet scales yet now is the time to begin. Don’t try to get through all of them in the beginning as you will go quite slowly at first. My students begin with C. Then I assign 1 flat and 1 sharp each week. When they have made it through the entire circle of 5ths, I have them begin again. But this time they work for speed.
If you can play it all in one breath, then you’ve really got something to write home about!
Right now go practice these scales and watch what happens to your technique. You’ll be amazed.
Have fun!
DoctorFlute
How to Practice Triplet Scales
Practice with Me Triplet Scales C, F and G Major Scales with Their Relative Minors A, D, and E
Practice with Me Triplet Scales 2b & 2# – Bb & D with Their Relative Minors G & B

The post Practicing Triplet Scales appeared first on DoctorFlute.
]]>The post Trilling Faster appeared first on DoctorFlute.
]]>Train All of Your Fingers to Move Faster
You can. You can train those muscles to move as fast as every other finger. Our fingers do move unequally. They have different strengths because of the different role they play in the hand. So, it’s our job to train those muscles to move equally. For example, while our first finger might be able to trill really fast, if we’re trilling our pinky from a D to an Eb, it’s often very uneven.
The best exercise that I have found is of course in the flute player’s Bible Taffanel & Gaubert 17 Grand Exercises for the Flute. If you have the book, turn to the last exercise in the book.
Taffanel & Gaubert
When looking at this exercise it looks somewhat frightening because of the amount of black on the page. Don’t be scared off! The way I work on these trill exercises is with a metronome at a slow speed. Set the metronome on 60 or slower if need be. Then take a look at the two notes you will be trilling between. The first set of trills is a D to an E. Now I don’t begin trilling right away. First I’ll make sure that I am rock solid with the tempo.
Since the written rhythm is measuring the trills, I will tongue the first note. In other words there are 4 Ds per beat. I tongue those 4 Ds for about 4 beats and then immediately move into the measured trill. This method helps me to hear that steady D and not let it get uneven when I begin the trill practice.
You must be listening to your trills with intention. Listen for every uneven movement between these two notes. Sometimes you can be very even for 6 beats. But then your trill starts to become uneven. Hang on to that evenness. Don’t allow this to happen. If it is really a problem then slow down the beat.
Breathe Wherever You Need To
Don’t worry about taking a breath in the middle of it. You’ll have to take a breath in the middle because you’re not going at some insane tempo at which you can get the whole line done in one breath.
Taffanel & Gaubert takes your trills all the way up. However, I wouldn’t do that many in one practice session. If you’re really working hard and concentrating, this exercise can be a bit on the tedious side and you’ll lose your concentration. So, I recommend not to work on too many in one practice session. Also I think it works best to work on that same group of trills for a number of days or even weeks in a row. Don’t play a different set everyday.
Keep Your Trill Practice Time Short
Eventually you will work your way all the way up, slowly making sure your fingers move at the same tempo. You’re training your muscles to get faster together. Go all the way up the T&G exercise. Then increase the tempo, keeping your fingers moving together, faster and faster.
That is the best way I know to get faster on your trills. A side benefit of working on your trills in this way is it works as a tone exercise as well if you work on not blowing too much air.
Have fun working on your trills!
DoctorFlute
Watch me demonstrate this: FluteTips 64 Trilling Faster
FluteTips 49 Every Trill Has its Own Finger
Improve Your Tone by NOT Playing with Too Much Air
The post Trilling Faster appeared first on DoctorFlute.
]]>The post Practicing Technique Backwards appeared first on DoctorFlute.
]]>If there’s a note that is missing in that passage or your fingers just won’t do what they’re supposed to do at the speed of which you want them to go, then try this:
Play the Difficult Passage Backwards!
As an example, I have the Rivier Concerto in front of me and am going to use a short technical passage. When you’re playing backwards a shorter passage is better because it’s hard to keep track of the forwards and backwards once you get moving and change articulations.
The particular passage I am looking at is not an easy passage. There are a lot of accidentals. It’s not completely scaler or arpeggiated. Thus it doesn’t fit in the fingers beautifully. At this point let’s say I’ve worked on it a lot and it still isn’t clean at the tempo I want it to go. I am in need of some tricks to help me get all the notes cleanly. So, at this point, playing backwards is the way to go.
Do All the Taffanel & Gaubert Articulations
I will play the passage forward and then immediately take it backwards not stopping and restarting. The groups of 16th will be off which is exactly what I’m looking for in an technique exercise that will increase my fingers’ knowledge of the notes.
Now after I play it a couple times forwards and backwards and am comfortable with the rhythm, then I will change the articulation. Tongue one slur 3, slur 3 tongue one, tongue 2 slur 2, slur 2 tongue 2, basically go through the Taffanel and Gaubert articulations. Keep it slow. Only as fast as you can accomplish each articulation forwards and backwards evenely. Do each 2x or as many as needed to feel comfortable at the tempo that you are doing it at. Don’t worry about where you take a breath, you’re doing it slower than your goal tempo.
Take the Breath Where You Need To
Sometimes there are repeated notes that throw a kink into the backwards forwards thing or the rhythm doesn’t lend itself nicely to keep groups of 4 or 6. No worries. Modify as necessary, begin at a different spot add a note to let yourself do the necessary articulations.
It really works. It’s a brain thing. It’s really seeing what those notes are that maybe you didn’t comprehend before. Try this method on your difficult technique passages. Use those articulations forwards and backwards. Go right into backwards don’t stop turn it around and keep going. I think you should find that it is one more tool in your tool box to help clean up those runs. It helped me!
Have Fun!
DoctorFlute
Watch me demonstrate this: FluteTips 58 Practicing Technique Backwards
The post Practicing Technique Backwards appeared first on DoctorFlute.
]]>