The post Arm Placement for Better Tone appeared first on DoctorFlute.
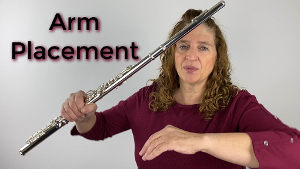
]]>Did you know that arm placement can influence your tone? It can also affect the long-term health of your flute playing. There is a lot that can be thought about with the positioning of the arms to help create the most relaxed yet functional flute playing, and the surprising thing is it can affect tone as well.
Let’s get into arm placement and do some experimenting with the position of the arms and the angle of the flute.
I was reading an article by Patricia George who is great teacher and was editor of Flute Talk. She has a series of books with her flute partner Phyllis Avidan Louke. They have many good lesson and exercise books that are really quite valuable. If you haven’t looked at their books, you should. But I was reading what she was suggesting about arm placement and tone, and I thought, you know what, I need to experiment with that.
Prior to this I hadn’t given arm placement a great deal of thought. I certainly had never experimented with changes to see if doing something different would enhance my tone or give more relaxation to the arms and wrists. For this I had to go to the mirror to see what I was doing naturally.
Arm placement
If you ever played in marching band, you know that you are playing with a straight flute and elbows high. It is what is required by band directors. I always know when it’s marching band season because my high schoolers come to with their arms and elbows stiff and straight. And guess what? They are not getting a fantastic tone.
That looks really good in marching band, but it isn’t how you get a great tone and if that posture were to continue you would eventually cause yourself repetitive injury issues. Now, I bet none of you are playing with your arms as straight as that. But look in the mirror and analyze what is happening.
In Patricia George’s post she said (I believe she was quoting one of her teachers) that the only thing that should hang on your flute are your arms and your jaw. I think what is meant by “jaw hanging” is just that you need to have a relaxed embouchure. It should just be loose and relaxed.
What about the arms? If I bring my flute up to my lip, how should my arms be positioned? I’ve had students where they really hang their arms in a not so good way. If they hang too much on the flute, then the fingers are affected and not at their optimal angle. You don’t want anything awkward when you’re talking about your arms. When I put my flute up to my lip, I want a natural angle of flute to arms.
I have often told my students, don’t look like you are hanging on a branch or that you are pulling yourself up and holding so you don’t fall off. There does need to be an angle from fingers through the wrist to your elbow but it’s a relaxed angle in your elbow. I don’t want to do anything forced. When thinking about the right arm and elbow, I generally recommend that you should bisect that angle that would be created from the two extremes. More specifically if you thought about one extreme being your arm is hanging down like you are hanging from a branch and the opposite being that you are marching band straight causing strain on your wrist, that would be a 90-degree angle. Somewhere in between the two is the right place for you. I like to have my students do the marching band position and then lower the elbow until the strain on the wrist goes away. Whatever angle gives you relaxed hands.
Forward Arms
Another point that Patricia George brings up is about how the end of the flute should be past your nose. If you were in marching band that flute is straight from your nose through the shoulders to the end of the flute. This makes the flute line look really good for the judges when they look down the line. What is really suggested here is that the arms should move the flute forward a bit so that there if someone were to look sideways at you with your flute up, they would see the flute create a bit of an angle between your embouchure and the end of the flute.
The idea is that this position gives you more projection, a bigger sound and better intonation.
Stand in front of a mirror and experiment with pushing the flute a bit forward. Do your usual way and then move the end of the flute forward and see what this does for your playing. Use a tuner and see what difference that can make.
Always remember that experimenting for what works best for you is the goal. The goal is not to do everything exactly as everyone else says to do it. By experimenting with these ideas, you can find what works best for you.
So, perhaps you need to change your angle. I’m here to give you the freedom to just try it. Sometimes, we get stuck and don’t think we can change but we can!
Experiment with the position of your arms and their angle and see what gives you the most relaxed arms and the best sound!
Have fun!
DoctorFlute
Watch me demonstrate this:
Arm Placement for Better Tone – FluteTips 180

10 Commonly Asked Questions About the Flute – FluteTips 143
The post Arm Placement for Better Tone appeared first on DoctorFlute.
]]>The post Is it Time to Upgrade Your Flute? appeared first on DoctorFlute.
]]>
So, you have been playing flute for a while, and you've been playing on a beginner flute. The natural question that comes next is this question of whether it is time to move up to the step-up instrument. Now that is a question that is for you to decide. The bottom line is, if you have the funds you can upgrade to the next level flute any time you want.
There have been a few times in my private teaching life where an adult comes for lessons, and they have a really nice flute. By “really nice” I mean that they have way more flute then is necessary for them as a beginner. As long as the student knows how to take care of an expensive instrument, I am fine with that. But I would not recommend an intermediate flute for a young beginner.
Okay so if you are asking the question is it time to upgrade? Then let’s discuss why it might be time for you to upgrade to a better flute.
Generally, I think it is best to start off with a beginner instrument, especially with the younger students, because you want to test the level of interest. A beginner instrument allows you to develop as a flutist and musician for a while with a flute that will respond easily enough. It allows you to decide whether you want to continue learning and move to the next level.
For younger students, these beginner instruments are built hardier than the step-up instruments, and they can take a little bit more of a beating. If you are shopping for a beginner instrument you do not need to try a lot of different ones. They are all in the same basic price range, are factory made, and have a variety of sound qualities that will generally allow the beginner student to get a solid beginner sound.
When I believe it is time to upgrade is after my students and I have been working on tone quality and embouchure for a while. Since every student is different, I recommend upgrading at different times and ages. The key is embouchure. I do not think that a new flute will do for you what you want it to without having worked on your embouchure.
By the word embouchure I mean tone.
A step-up instrument allows you to develop a better tone quality because you are adding silver to the instrument. More silver equals a more refined tone. Beginner flutes have a silver plating that is mixed with Nickel. Intermediate flutes have solid silver head joints and either a solid silver or plated body. Either of these options will directly affect the tone that one can achieve on the flute.
If you have been working on tone, then trying a step-up instrument with a solid silver head joint will make a world of difference for you. If you have not been working on tone development, then you may not be able to hear the difference from your beginner flute. This will make it harder to choose which flute is the best for you. Plus, it can be discouraging to not hear an instant improvement in your sound.
Now, it is true, you can get an upper-level flute first, and then work on your embouchure. The potential for improving your performance is still there in those instruments – waiting for you to unlick. But I think when you move up to the next level instrument, you do want to hear the difference right away. However, you may not hear that improvement, if you have not begun to develop a nice tone on the instrument you already have.
Besides tone, there might be a couple other considerations when you are thinking about stepping up. One of those is the finger action. That is, how do the keys move for your hands? Flutes are made generally the same, so it isn’t that they keys are in different spots. So, it is more about how the keys feel for you. Maybe you are developing a nice quick technique and you are looking for key action that is quiet and smooth. Beginner flutes do not usually have quiet smooth keys. You can definitely feel the difference in the key action of a beginner flute (clunky action) and an intermediate flute (smoother quiet action).
Perhaps you are looking to move from a closed-hole instrument to an open-hole instrument and moving from a C foot to a B foot. Those are all legitimate reasons to upgrade.
But I think the most important thing is your tone. If you can get a great tone on your beginner instrument, then it is time to experiment with an intermediate flute and the improved sound that silver can offer.
So, my advice about whether to step-up is to begin by improving your embouchure. Work on improving your sound so that it is almost to what you are looking for. Then when you upgrade to that silver head joint or silver body (depending on how much money you are going to put into it) then you are going to be amazed at the power and the resonance that you can get when you do step up to a better flute.
Have fun!
Doctor Flute
Watch my video as I help you decide if it is time to upgrade your flute.
Is it Time to Upgrade Your Flute? FluteTips 131

Helping Waverly Choose Her Next Step-Up Flute

Should You Put a Professional Headjoint on an Intermediate Body? FluteTips 170
3 Levels of Haynes Flutes Compared Custom Handmade vs Q Series Semi Pro vs Amadeus Intermediate

Flute Review Haynes Amadeus Model 680 Step Up Flute
Flute Review Trevor James Chanson Step-Up Flute

Flute Review Di Zhao 400 Step Up Flute

The post Is it Time to Upgrade Your Flute? appeared first on DoctorFlute.
]]>The post Grounding appeared first on DoctorFlute.
]]>For this blog (and Flute Tip) I will reference a book titled The Virtuosic Flutist which was written by a good friend of mine named Nina Assimakopoulos. You can find her on Instagram under her name and The Virtuosic Flutist. This If you don’t have it in your library go get it. It's a great book to have in your repertoire. The technical aspects of flute playing that she describes, vibrato and breathing and different things about parts of your body and how you use them, are really very well thought out. There is a lot of reading material and then there is the exercises that you then apply what you read. Also included is real musical examples and exercises to apply the skills you are learning.
Let’s talk about the first aspect of grounding mentioned in the book and that is your stance or how you are connected to the ground. Do you have a nice, solid playing stance that allows you to be flexible, be relaxed, but also solidly in place? I have seen many people play for me with a bad playing position. They are uncomfortable and unsteady. Oftentimes their feet are too close together. This is not a solid stance from which to begin practice. Consider that our feet should be a shoulder width apart in a comfortable position, so that you are standing straight and tall when you breathe. Your breath can come from your toes and go directly up into your sinuses. You should feel that you are a solid rock right here as you stand. There's nothing that's going to tip you over or get you off balance. You're right there.
Another aspect of grounding is what Nina refers to as breath energy, or the process of how you're taking that breath. Are you opening up your sinus cavity? Are you opening up your mouth? Are you opening your throat in? And are you filling up your stomach and ribcage? Does the playing position allow you to fill up from the feet and then create air pressure or support which is so necessary to have the sound that we're all looking for? Nina goes into a lot of detail about your vocal tract, the different parts of your throat and your mouth and how it all works together. It is interesting and helpful so please read her book!
Another important aspect of grounding is your finger engagement. Do you keep your fingers right over their keys? Are they light? This is something that I find very important in my playing and teaching. A lot of students miss the importance of a light touch on the keys. I see so many times fingers that are not just on their keys but fingers that hang onto the flute as if on a branch to keep from falling. Those fingers are going to be very stressed and tight. Besides the light finger touch we need to not let fingers fly up after being pressed or not being used. We all can see when students’ fingers fly up. But in reality, you should keep them low on their keys with the pad of your finger resting on the hole. That's the best most relaxed position to be in. Make sure when you use those fingers, they are also light! When I play, my fingers are completely relaxed. They're loose, and can move with agility. Tight fingers are going to create tight hands and arms and a tight throat, and affect your tone.
It's all connected!
If you are having trouble with that, I would use the exercise that I learned way back in my youth which is to play Taffanel and Gaubert’s 17 Grand Exercises for the Flute exercise 1 or 2. Because the exercise is in scales you don't have to think about it and can work on your fingers. Learn to keep them light and not use any pressure at all. Nothing. Then your fingers will never ever get tired.
On to breathing. When you take your breath, do you take a real one? In other words, do you fill up your stomach and ribs and completely fill up from bottom to top. If you don’t learn to fill up all the way then you need to work at stopping and breathing. Take the length of time you need to take that breath, and then come back in. That's the best way to learn how to breathe properly; come to a full stop, come back in, and resume playing.
When you take your breath, you need to open up the mouth cavity. It is very important that your mouth is open with your teeth being a finger and a half apart. This openness allows for the throat to stay open and the sound to come out. It makes a world of difference in your tone when you open up. It is immediate gratification!
Now, the fun part of this is the exercise. Since you've learned to breath properly, open your mouth cavity, open throat, your stance is good, and your fingers are close and light, you have now earned the right to practice this grounding exercise. You can listen to the exercise in the video to know what it sounds like, but basically it is a version of a scale with no skipping around. To play each note Nina says to use a stomach, "Huh" as you play, accenting your different notes. Now, after having practiced this for a bit, I will tell you that if you work on this, you're going to have great abs. It's a strong exercise for your abdominal muscles and playing it for a little bit can get tiring in the stomach muscle area. In the video I demonstrate how to play the exercise with the stomach “Huh.”
Breathe anywhere that you want. Keep your fingers close, and then be aware of what you are playing. Think about it, don't just play it. Think about what you're doing, your stance, your fingers, your throat, your mouth cavity and your stomach. She then advocates that you play these in all major and minor keys.
The exercise is about two-thirds of a page but I can tell you that just after a line or two, my abdominals are a wee bit tired. It's a lot of work! But I hear it just working on my tone right now making my tone get bigger and fatter and more resonant.
I love this exercise. If you haven't gotten Nina's book yet, it's available both in a digital copy and in hard copy so wherever you are in the world you can get a copy. You can do that either from Nina's website or you can get it from any online retailer, such as Flute World.
This should be in your arsenal of technique books. There are ways of thinking about flute technique that aren’t your everyday traditional way. So, get this book, work on this exercise, do your sit-ups, you'll be happy, and you’ll hear your tone get better and better as you do it.
Have Fun!
DoctorFlute
Watch me demonstrate this:
Grounding from Nina Assimakopoulos book The Virtuosic Flutist FluteTips 112

Tone Color from Nina Assimakopoulos book The Virtuosic Flutist FluteTips 107

The post Grounding appeared first on DoctorFlute.
]]>The post Fast Easy Clear Flute Double-Tonguing appeared first on DoctorFlute.
]]>Some flutists think they don’t need to double-tongue because their single tongue is fast enough. I’ve definitely heard some fast single tongues but none that are as fast as a well-working clean double-tongue. Once you have this articulation down pat, a world of speed is open to you.
Let’s take a look at how to double-tongue so that your speed is not encumbered by a slow tongue.
I've done videos on problems with double-tonguing: how to do it better, how to do it faster, how not to rush. Today, I want to go back to the basics and explain how you double-tongue to achieve maximum effect.
I have come across some issues with students when I've taught them how to double-tongue and it all goes back to where they place their ta. There are many teachers out there that will give you different syllables to use and have different tongue placements such as tonguing between the lips. They are not wrong. There is more than one way to accomplish this goal. However, I feel very strongly that the position of the tongue on the roof of the mouth is very important for fast sustained and clear double-tonguing.
It all goes back to the basics of where you place your ta. Now, when I've taught students from different cultures, even from my own culture it seems that when an articulated “ta” sound happens in speech it can be in different places in the mouth. I haven’t come across anyone who puts the “ta” in a different spot then the roof of the mouth. Generally, it is the exact location that differs. Once I discovered that, then I was able to help students better achieve how to single-tongue and then how to double-tongue.
The tip of the tongue should be thought of as a point. That point is then placed as far forward as you can get without being on the teeth. If you feel the roof of your mouth with your tongue right between the two front teeth is a little nob. Make sure that you are on the roof, not on the teeth. Then run your tongue back until you reach the ridge. After the ridge the roof arches up and then moves into the soft palate. It is helpful to pick up your flute and tongue a few short single tongues. Determine where you actually tap when you say “ta”. The correct spot is on that little bump between the teeth. While I say it’s between the teeth. I don’t actually mean to tongue on the teeth but on the roof of the mouth. I know that linguists probably have an actual name for that little bump, but I don't know what it is. Practice saying “ta” right there both in speech and on your flute. The articulation should be very clear and crisp.
With this in mind, most of the time the issues with double-tonguing are because that “ta” is somewhere between the bump and the ridge. When you double tongue and your “ta” placement is too far back then when you add the “k” sound that is placed either further back or the tongue has to move back and forth to bring the “k” forward. It should be obvious that this movement is a waste of time. You double tongue because you want to move fast. But a cumbersome tongue is not fast.
I used to have this problem in high school with double tonguing. I remember working on the Mozart concertos in the fast 16th note sections and the roof of my mouth would feel bad. I wouldn't really call it sore, but it would feel like I needed a massage. I wanted to find a way to rub it. I think it was all because the K was forced to hit too far back causing this fatigue. Once I learned to place the “ta” properly I could double-tongue all day long and never, ever have an issue.
One of my early teachers, Georgetta Maiolo, with whom I studied both in high school and then again for my master's degree, had this easy exercise based on the F-scale to practice double tonguing. Try this exercise:
- Say T-K-T-K-T (Actually speak this out loud.)
- Make it nice and easy when you say it, and phrase it as a group of 5.
- Now on a low F tongue that group of 5. Make sure to keep the tongue in the right spot. Don’t push it, don’t force the tone.
- Next play up 5 notes from the F with that nice and easy tonguing.
- On the top note (C) tongue the group of 5.
- Double tongue down C to F.
- Here is the tricky spot tongue a group of 9 T-K-T-K-T-K-T-K-T on the F.
- Double tongue the F up to C and back down to F.
- Repeat on the next note of the F scale.
Don’t worry if you don’t get a good sound right off the bat. It is more important that your tonguing is correct. Tone will follow.
Some aspects to think about:
Always keep the tongue relaxed however keep the support strong.
If you let go with your support the tongue has to get stronger which makes the sound what I call hen-pecky. This is a choppy sound without much tone.
Keep the air going through the double tongue. When you say it with your voice there are no stops between the syllables. Make sure that is the same on the flute.
If you hear an extra thunk type of sound in your mouth, then your tongue is too far back. It has been allowed to move back.
The Thunk
Most of the time, students that come to me have that thunk tongue noise and they have no idea that they are doing it. They just do not hear it. They might feel something on the roof of their mouth, but they don't really recognize that it makes a noise. Once they start hearing it, then they fix the tonguing. But until you actually hear that noise your tongue makes, when it is in the wrong spot, it's a lot harder to fix. You just have to go by your teachers’ word that yes, they can hear it.
Once you feel that you are understanding and executing double tonguing in this exercise then it is time to put it into your solo. Approach double tonguing in a solo much the same way as you would this exercise. Take a group of four 16th notes add the first note of the next group and tongue the group of 5. Then tongue the next group of 5. Now put those two groups together with your group of 9. Work your way through 16th note passages in this way. Repeat going a little bit faster. It seems maybe a slow process, but it will keep you accurate.
All right, so the basics for double-tonguing, is to tongue forward right on that little knob right between your two front teeth and keep it there when you add your “k”. Keep your air pressure through the tonguing don’t close off the air stream. The tongue needs to stay light. When you do this, you can double-tongue all day and all night!
Try it. You will find that this is a great way to double-tongue.
Let me know in the comments if you have any questions, I'm happy to answer.
Have Fun!
DoctorFlute
Watch me demonstrate this:
Fast Easy Clear Flute Double-Tonguing FluteTips 111
Single Tonguing 3 Different Ways – FluteTips 94

Single Tonguing to Improve Tone & Get Back In Shape Fast – FluteTips 79

The post Fast Easy Clear Flute Double-Tonguing appeared first on DoctorFlute.
]]>The post Tone Color appeared first on DoctorFlute.
]]>Tone color is one of those things that's just a little bit ethereal. What really is tone color? And how do we do it? What does it mean when we play the flute?
I remember when I was in college, thinking, "All right, so what's this tone color thing all about?" Up to that point I played one way, that's it! If there were tone color changes, well, they just mysteriously happened. I didn't really think about color, or about how I could color at will. I didn't understand tone color, much less the fact that it is a performance tool that you can use to make your music more enjoyable to perform, and more interesting for the audience.
How Does One Change
the Color of One's Tone?
Simply put, you can change the tone color by changing the shape of your embouchure, the tightness or looseness of your embouchure, and the angle of your airstream.
For example, If I play with my head up and embouchure long, that will give me the kind of the sound I want when I want a woody sound. That's a tone color. If I play down, moving the angle of my air down, and widen my embouchure, it's going to give me a completely different sound.
To talk about tone color, I'm going to use a book titled The Virtuosic Flutist which was written by a good friend of mine named Nina Assimakopoulos. You can find her on Instagram under her name and The Virtuosic Flutist. This is a great book. It's got wonderful writing about tone color and how to achieve it. Nina also gives exercises for you to practice changing your tone color. I'll use her exercise to explain to you how she says to start experimenting with this tone color. Then I'll tell you how I'll use that in a piece to vary my tone color in a performance.
Now there is a lot more that we could discuss about tone color than what I write here, but this gives you a start. It is a place to begin. This book gives you the tools to show you how to begin. When you get this book read it from beginning to end like a book. Then get your flute out and try the exercises. In the section that tone color is discussed Nina says to practice tone color by using vowels.
Think of Shaping Your Embouchure
by Saying Vowels
eee (E)
eh (A)
oh (O)
ooh (U)
Let's talk about vowel sounds. If you make your mouth different shapes, as far as vowels go, A, E, I, O, U, they change not only your mouth shape, but also the inner cavity of your mouth. This has a direct application to your flute sound that you can apply to your playing. She uses four vowels sounds, eee(E), eh(A), oh(O), ooh(U). Say those and notice that when you say eee, you are wide, eh, a little bit wide, but longer, oh, shape is different, and ooh, those are very different shapes.
The exercise in the book uses a five-note pattern where you play these patterns with a particular vowel shape. So, an eee shape on F maybe a little bit different of a sound than an eee shape on A. Again, this is for you to experiment with, and this is just a jumping off place.
When I use the eee vowel shape, to me it's a very present sound. I feel like it's modern and edgy.
Then when I use the eh vowel shape, I feel that opens up the sound a little bit more. It takes some of that edge off.
Try it, I think you can clearly hear the difference between these when you change the shape of your embouchure in this manner. These differences are the nuance known as tone color.
If you watch my video, I will demonstrate how you can use these vowel shapes to change your tone color to get the effect that you want in a piece. I'll play a passage from Bruce Stark's American Suite, the 3rd movement called Muse. This is supposed to represent some places in Arizona and the Nevada mountains, and the ocean in California. I think specifically the ocean at night.
I'll use these different vowel shapes and play and see what they sound like. Then I'll decide what combinations of vowel shaped embouchure that I want to use to make the piece my own. This makes it interesting for me because I like this kind of challenge. And I like to think that it makes it more interesting for the audience.
Nuance
Noun - The subtle differences in the sounds
of the notes that you play
Verb - Using your embouchure to vary the sounds
of the notes that you play
There are four different tone colors that you now have at your disposal to use in any piece you perform. If you've never thought about tone colors before, or you didn't really understand the idea, or like me, I knew I could get different colors, but didn't know how or where do apply them. Then this gives you a great tool to use to experiment with changing the tone color.
Now is the time to start experimenting with tone color. You have a lot of different ideas presented to you in Nina's book, After trying these exercises it's time to try it in your solo. Take a phrase and use these vowels sounds to express this phrase differently. See what you like and then mix it by using more then one vowel sound in the phrase to change the color. There is no right or wrong. It is completely up to you. Go ahead and decide what you like.
This is where music gets to be really fun and makes practicing exciting. Music comes to life! If you've never practiced with tone color, get Nina's book. Practice it, read it, do what it says. It's going to change your playing.
Have Fun!
DoctorFlute
Watch me demonstrate this:
Tone Color from Nina Assimakopoulos book The Virtuosic Flutist FluteTips 107
Grounding from Nina Assimakopoulos book The Virtuosic Flutist FluteTips 112
The post Tone Color appeared first on DoctorFlute.
]]>The post What Do You Say After a Performance? appeared first on DoctorFlute.
]]>“Oh, great job!”
And inside you're thinking:
“Ah, I wasn't very good. I messed up here. I messed up there. I didn't do this right. It's not the best I could have done. The piano rushed!”
But what do you say to that person that is complimenting you and is so eager to see you after a performance? Well, let me tell you that the only answer to that is:
“Thank you. I enjoyed playing that too. It was great fun. I'm glad you enjoyed it.”
Always. Always, always affirm the person that is giving you this compliment and then talk about how much fun you had performing it. You don't want to give away all your secrets, right then. Don't say:
“I was really nervous or I flubbed up here, or, Oh, you don't know that the piano player and I got off from each other or whew, that was bad!”
You must say “Thank you. I enjoyed performaning.” Find a way to affirm the person giving you that compliment and don't take away from their pleasure of hearing you.
I'm sure it's happened to everybody when someone has said, Oh nice hair and you say, well, I just rolled out of bed. They are probably very genuine that they think your hair looks really good but to you it's a bad hair day. You didn't do anything with it and it's not the way you like it to be. It's the same way with a performance.
People can enjoy a less then perfect performance, because everybody hears different things. Every persons takeaway is different from yours. You have such familiarity with every single note and an intimate knowledge of each of those pieces. But, your audience, the vast majority of the audience, doesn't know those pieces the way you do. If they enjoyed it, then you need to say thank you and stop there. No buts. No I wishes. No anything about the secrets that happened in your head with your fingers or on the stage. You're going to tell them how much you appreciate their compliment.
It's okay to look at your teacher standing in the back of the crowd and lock eyes with them and the two of you can know that something occurred. But your audience doesn't know that. There have certainly been times when I performed a piece that was not to my liking. One prime example was a recital that began with a piece called Valentine trills from a book of musical Valentines that Carol Wincenc commissioned. The short piece that I opened the recital with was all trills! Everything was a trill in that little Valentine.
Maybe in hindsight, that wasn't the best first piece to settle my nerves in a performance. I probably should have started with something else, and then moved to that piece. I definitely showed that I was nervous. I thought that the trills weren't even, that they didn't come out and come across to the audience the way I wanted them to. But afterwards people said that I did a great job. They loved that piece. In my mind it was not good. However, later when I listened to that piece on the recording, I thought, wow, nothing, nothing that was going on in my head about what was wrong with that performance came out in that recording, nothing.
I thought, who is that person playing? Because it can't be me. That really taught me a lesson. The things we hear in our head sometimes is not reality. It's not what the audience hears. It may even not be what your flute teacher hears and you have to accept that and that's okay. That's okay. We all have our demons. We all go home after a performance thinking that some part of it wasn't good. I could have done this or that better. All those things go on in our heads.
But we need to accept that we played music. People enjoyed it. So, we should enjoy it too. Accept those compliments. Know that they're meant genuinely and feel good about that compliment. Don't feel bad about something that may or may not have gone astray.
Now, yes, there's those times where it was a real bomb and perhaps everybody knows because you were doing a piece for memory and you had a memory slip.
But you know what? Things like that don't ruin an entire recital. You and your teacher maybe are the only ones that are going to be the ones that talk about it afterwards. No one else remembers that. They only remember the good. I think that's a lesson for life to remember the good, keep that in the forefront and enjoy performing. Don’t think about the mistakes that you have made.
The next time you perform and you don't think things went terribly well, but someone comes up and tells you how wonderful it was, that they loved your performance, your sound was great and everything else, you smile and say, “thank you. I loved performing too and I'm so glad you enjoyed that performance.” And leave it at that. Take the things that you want to say about it away, put them in the back of your head and don't tell!
Have fun!
DoctorFlute
Watch my video of this: FluteTips 93 What Do You Say After a Performance
The post What Do You Say After a Performance? appeared first on DoctorFlute.
]]>The post Does Your Current Teacher Teach Differently Than Your Past Teacher? appeared first on DoctorFlute.
]]>Every teacher has their own style. But sometimes our teaching style doesn’t always work for every student. I feel that I’m pretty easy going.That is my personality style. But low-and-behold my personality style doesn’t give everyone of my students a warm fuzzy feeling that spurs them on to superior performance through determination and hard work.
However, there have been very few students through the years that just didn’t buy what I was selling. Very few.
From a teachers point of view, when my student just wont accept my instruction, it is both distressing and motivating – for me. I always approach that particular type of stubborn student with the intention of discovering how I can reach them. Can I learn what makes them tick? What is their personality style? What will they respond to? Then I will mold my instruction methods into an approach that might help me to reach this particular student.
Don’t you bend over backward to reach your students – to help them become better flutists?
FOR THE STUDENT
What does a student do when they realize that the teacher they have chosen to study with at college is not what they expected?
Let me be blunt: you’ve made your decision.
While you’re at this school you better do your best to look at that teacher every week and figure out what you can learn from them. They earned their degrees; the college hired them; you were accepted into the program. Until you transfer or graduate, be present.
Nothing can be gained from attending lessons week after week with a bad attitude.That attitude will prevent you from gleaning skills from a different perspective that will help you to be a better player and a better teacher. It does not benefit you to be argumentative with your teacher. Nor does it help to be oh-so-polite but then never practice what the teacher asks of you. Believe me, teachers know when a student is being polite, but then not practicing what has been asked. The tension in the air is always felt, even when the student tries to hide it.
Most teachers appreciate when a student engages them in respectful questioning. I like when I can answer a student’s questions. Both of us learn. Attitude is the thin line that separates polite respectful questioning from disrespect.
I’ve had private students who have come back after their first semester of college just miserable because the college professor’s methods are so different (usually pertaining to breathing and tone) from what they have learned from me.
I give them their only two choices:
Either buck up and learn from this teacher, or transfer to a new school.
There is no wiggle-room. If they choose to stay at this college, with this teacher, they eventually discover that there are in fact multiple methods by which they can learn and grow into a proficient thriving flutist and/or flute teacher. In fact, I believe that every teacher can give a student new and different tools to put in their tool box. Then, when needed they can pull out the correct tool for the occasion. These tools may also be helpful when the student becomes a teacher with students of their own who have different personalities and learning styles. All these tools will make them a better teacher.
If you are in a situation where you bucking against your teacher’s methods, decide right now to figure out how learn from them. Go into lessons with a changed attitude, be respectful, question politely with an attitude of learning, and then go home and practice these techniques. You will be pleasantly surprised that your skills will improve and your relationship with your teacher will improve too.
Now go analyze your own attitude and be intentional about changing it!
Doctor Flute
The post Does Your Current Teacher Teach Differently Than Your Past Teacher? appeared first on DoctorFlute.
]]>The post Veebrrrrraaaato or Vibrato Part I appeared first on DoctorFlute.
]]>It is one sticky wicket.
As a teacher, I can’t see into my student’s throat to actually see what’s going on. But, there’s no single exercise that creates a no-fail vibrato. All we teachers can do is use techniques that we’ve used in the past with other students and hope that it works for new students. Then when it doesn’t we try to come up with variations on a theme to help those students.
Another voice teacher told one of my students that “not all voice students have vibrato. Some just don’t have it.”
I think that is a bunch of baloney.
Every student I’ve taught has gotten vibrato. I will admit that they get it to varying degrees. Not everyone has gotten the vibrato that I desire for them. But they all achieve a workable vibrato to some extent.
 So, what do I do to teach vibrato?
It’s basically is a trial-and-error method.
Now, I am not going to write here and tell you I have the “God-given method” that is no-fail. Nope. Not going to do it. Because, well I don’t have THE answer that works every time to perfection without fail.
I will, however tell you about the method that I use. It’s my own method – one that I developed. And it seems to work. But I’ve done different variations on this for different students to find a way that works for them.
Before I work with students on vibrato, I make sure that they have a good working knowledge of breathing and support. Vibrato will never be great without those two areas working well first.
If you haven’t figured those two out yet then read my blogs and watch my FluteTips on breathing and support first. Then, come back to this blog.
The first point of agreement that we need is that vibrato needs to sound organic to the tone. That is, if tone was a hollow wave moving up and down, then vibrato would fit into it and move seamlessly with tone. I like to draw this picture for students so that they can visualize what it looks like. It is easier to do with a picture in your head.
Let me tell you it gets a bit complicated and it takes a lot of experimenting but are you ready for more?
Ah, but you have to wait until the next post! I’ll see you then.
Enjoy,
Dr. Flute
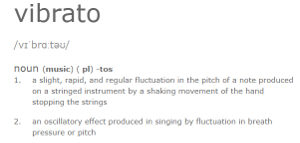
P.S. Thanks to Dictionary.com for their definition of vibrato:
“vibrato”. Dictionary.com Unabridged. Random House, Inc. 13 Sep. 2017. <Dictionary.com http://www.dictionary.com/browse/vibrato>.
The post Veebrrrrraaaato or Vibrato Part I appeared first on DoctorFlute.
]]>