The post Why Are Professional Flutes So Expensive? appeared first on DoctorFlute.
]]>There is no comparison!
Professional flutes enable the flutist to tongue sharply, to legato and taper, to easily get your high notes out, and to get a rich sound in the low register. The professional flute body has keys that enable your fingers to fly with a light and graceful touch unequalled in the lower models. The professional hand cut headjoint offers a variety of lip plate metals and embouchure hole cuts and shapes that enable a flutist to produce a beautiful variety of colors. This would be virtually unattainable on an intermediate level flute.
This is why professional flutists perform on professional model flutes. They are not only gorgeous to look at, but they also feel great in your hands, and enable you to give your very best performance.
That said, why are professional model flutes so expensive? And is there anything that you can do to drive down the cost? Well, some professional flute extras are optional. Other features are just part of the package – the cost of a professional model flute.
Here’s the rundown. We will look at eight categories: metal, maker, mechanism, headjoints, tubing, pads, extras, and maintenance. I will point out if and where you can compromise, and what that will cost you in dollars and performance value.
Metals
One of the top reasons that professional flutes are so expensive is the metals used to make them: silver, gold, and platinum. These metals cost more than the nickel alloys used in beginner flutes, and there is much more precious metal contained in professional flutes than in silver-plated intermediate flutes. So, more precious metal means more cost.
Than why do we use silver, gold, and platinum? Because it sounds so good! The beautiful look is just a side benefit. The sound quality that we can attain is the attraction to precious metals.
There are so many options too. You can have an all gold 14K flute from crown to B foot, including headjoint, lip plate, riser, body, tone holes, rings, ribs, and posts. You can even have gold springs. Not to mention platinum, or platinum plated. You could also have a gold headjoint, or just a gold lip plate, riser, etc. Some flute makers offer a blend of 5% gold and 95% silver. Or a 14K gold body with sterling silver keys; or 14K rings and tone holes; or 14K rose gold or white gold! Or 19.5K Gold!
The options seem endless!
In my opinion, once you move up to the precious metals, one is not better than the other. At that point it is just a matter of your preference. Which sound do you like best when you perform?
So, where can you compromise if cost is the issue?
No platinum, no gold. Just silver. Even move down from Sterling (.925) to Coin Silver (.900).
Personally, I own a professional model Haynes flute that is Sterling silver with a gold riser. The riser is the piece of metal that attaches the lip plate to the headjoint tube. I love what that little piece of gold does to my sound. It Is just enough for me. Although, sometimes when I try out flutes with more gold, my heart may wander toward that golden glow.
To find out more about how precious metals effect your performance, read my full blog on just this topic:
Which is Better a Silver Flute or a Gold Flute?
Maker
The best expression to use here is “this is where the rubber meets the road.” Beginner flutes are made in a factory. Professional model flutes are created in a workshop. Picture Santa’s Workshop at the North Pole. But instead of elves making toys, think of a master craftsman at a workbench surrounded by a 21st century array of magical tools and devices, toiling away day and night to create these flawless musical instruments that we simply call professional flutes.
Professional model flutes are called “handmade” or “hand crafted” because they are made by hand. They are handmade, hand rolled, and hand assembled. This personal touch is literally worth every penny. It is also what enables the flutist to make such breathtaking music. Professional flutes are the top of the craft, the state-of-the-art.
I am nearly breathless at the thought. But alas, this is the perfection that we crave. This artistry has a price. But we are so grateful that these bright young men and women dedicate their lives to perfecting their craft to create these musical masterpieces for us to perform on.
There is no compromise in this section. Your only option it to shop around because some professional models cost less than others. Just remember that you do truly “get what you pay for.”
Mechanism
The mechanism is the part of the flute that moves to the touch of your fingers. It includes the keys and everything that goes into making the keys open and close when your fingers press down and lift up.
The mechanism on a professional model flute is far and away so much better than an intermediate flute that you just must experience it for yourself. The very first time a professional flute is placed in your hands you can feel the difference in your fingers as you play through some scales. You can feel the light touch needed to push down those keys, and how responsive they are to your fingers.
Precision is the keyword to describe the mechanism in a professional model flute. This precision shines when you do your technical work, and your fingers fly across the keys. There is no comparison to an intermediate flute.
The price compromises that you can make in the mechanism are in the metals, inline vs. offset G, and the engraving.
All silver would be the least expensive. On some models you can add 14K gold rings for an additional $3,000. Others have gold alloy springs rather than stainless steel springs. This price difference would be nominal. So, I would not bother trying to make this change.
All flutes used to be made with an inline G. This just means that when you look down your flute, all the keys are in a straight line. Today, makers have moved the G key out of this line which allows your hand to not be bent so severely. This is an effort to prevent long-term hand injuries. But it sometimes comes at the cost of an increased price. You will find listings with offset G, or half-offset G costing $500+ more than inline G.
This may be worth the extra cost for you if you already have hand injuries or have larger hands. For me, I have always played the flute with an inline G. I have not developed any hand problems, and so I do not plan on changing to an offset G.
Additionally, some makers will add key engraving for an additional $1,000, $2,000 or even $3,000. So, if you see “key engraving” understand that those beautiful keys come at a premium.
To read more about how the flute mechanism effects your performance, read my blogs on this topic:
Comparing Soldered Tone Holes with Drawn Tone Holes
What Do Gold Springs Do for Your Flute?
Headjoints
Professional headjoints are referred to as handcut, hand rolled, or simply handmade. The flute makers want you to know that a master craftsman made the headjoint by hand: the lip plate and embouchure hole were cut by hand, the tubing was rolled by hand. And then all of these components were assembled by hand.
You can compromise on the price in two ways on a headjoint. The first is to compare all your options for the cut. Some cuts cost $500+ more than others. Check your options.
The second way is to check the metals that the headjoint is made from: silver, gold, and platinum. The more precious the metal, the greater the cost. Your options include the entire headjoint, just the lip plate, crown, and/or riser in many combinations. For example, platinum plated sterling silver!
Silver flutes come standard with silver headjoints. But from some makers, you can have a lip plate and/or riser made of 14K gold, 18K gold, or platinum for an additional $500, $1000, or $1500.
Of course, these prices are estimates and fluctuate with the price of the metals.
Additionally, you can add gorgeous etching to the lip plate. While it may not improve your tone, it may improve your look. That is what I would call a “pretty penny.”
To read more about headjoints, read my blogs and watch my videos about headjoints:
Does the Cut of Your Lip Plate Make a Difference on a Professional Flute?
Should You Put a Professional Headjoint on an Intermediate Body?
The Difference Gold Makes on a Headjoint – FCNY Sponsored
Tubing
The flute tubing is a term used to describe the cylinders that make the headjoint, body, and foot joint. As described above in the metals section, the tubing can be made of silver, gold, or platinum.
The tubing can also be made of varying thicknesses, which also differs between metals. Here’s the breakdown.
Silver:
Thin wall – 0.014 inches / 0.35 mm
Standard wall – 0.016 inches / 0.40 mm
Heavy wall – 0.018 inches / 0.45 mm
Gold & Platinum
Thin wall – 0.011 inches / 0.28 mm or 0.010 inches / 0.25 mm
Standard wall – 0.012 inches / 0.30 mm
Heavy wall – 0.014 inches / 0.35 mm
The thicker the wall, the more precious metal is used, which increases the cost, and the weight of the instrument. Thicker walls also increase the resistance when you play.
Although heavy wall gold tubing could cost an additional $2,500, tubing thickness should not be used as a cost compromise. It is to be selected by the flutist to match their own personal preferences and/or performance needs.
To find out more about how flute tubing effects your performance, read my full blog on just this topic:
Does Flute Tubing Thickness Matter?
Pads
The pads on a flute are the little lifesaver shaped pieces of fabric that are attached somewhere under the keys, such that when you press the key there is a seal made that perfectly prevents any air from leaking out. When you are trying to play a Low C, and one of your pads is leaking, it is impossible to the the Low C to come out – so frustrating! Professional model flutes have higher quality pads, that not only seal better, but they also release the keys faster, so you don’t glitch or crack between notes. These pads also last longer. That is, they are more durable and can handle the extra hours of practice that professional flutists need to prepare for performances.
Different manufacturers use different pads for their professional flutes. So, don’t be thrown off by names such as: Straubinger pads, Pisoni pads, Muramatsu pads, Sankyo pads.
These excellent pads are part of what makes a professional flute so good. So, there is no compromise in this section.
Extras
There are some things on a professional model flute that you can choose, let’s call them optional extras. Choosing these extras will make the flute more expensive and heavier. There are other things that you cannot choose. They are just part of what makes a professional flute, professional, and therefore make it more expensive, like the master craftsmanship, the mechanism, and the pads.
Here are some of the professional flute extras and what they may cost as an add-on in silver, gold or platinum:
Split E Mechanism + $350 – 2,500; + $3,500 in platinum
C-sharp Trill + $750 – 2,400; + $3,300 in platinum
Offset G or Half-Offset G +100 – 500
D-sharp Roller + $250 – 600; + $1,200 in platinum
Half Closing Thumb + $800; + $3,000 in platinum
High E Facilitator + $200
Other extras include:
B foot joint with Gizmo key
Drawn or Soldered Tone Holes
Pointed or Y-key arms
The B foot joint is usually standard on a professional model flute. But some offer a C foot instead.
To find out what each of these extras may do for your performance, read my full blog on just this topic:
Professional Flute Extras – Do You Need Them?
So, if you’re really trying to move up to a professional model flute, and you must make it less expensive you can opt out of the extras at the time of purchase, depending on what is in stock. If you want to opt out of all the extras, you may need to special order that flute with no extras, and you may just have to wait several months for them to make you this custom flute. But if that’s what you must do to enter the professional market, then I say it is well worth it.
Maintenance
While maintenance strictly speaking will not make a professional model flute more expensive to purchase. If will however over time cost more to have a professional flute maintained. You are not going to send your professional model flute to your local high school band Director for a clean oil adjust (much less a complete overhaul). No offense to band directors, bless their hard-working souls. I started out my career as a band Director. And yes, I repaired many instruments in my time. But I would never have agreed to work on a professional model flute. NEVER!
You will need a professional technician to work on your professional model flute. But not to worry, when you buy your very first professional flute, ask where you should have it serviced. Most likely they will have an in-house team and strong relationships with others who can help you.
Conclusion:
The bottom line in my opinion is that if you can afford to buy a professional model flute, buy it! You will love it. But if you’re not serious about playing the flute, well, then spend your money on chocolate.
It is important to remember that when you are shopping for a professional model flute that you are not shopping for the price, or for the performance of the instrument. You are shopping to improve the performance of the flutist. You are selecting the best instrument for you as a flutist to further your career and your performance enjoyment!
You should be asking which headjoint and flute give you the best tone.
This metal or that metal?
This cut or that cut?
Do I want more resistance or less resistance?
Can I achieve more colors with this combination or that combination?
I know that I opened with the question “why are professional model flutes so expensive?” But if you are reading this because you are already shopping for one, the real question that you must answer is why? What are your goals as a performer? Once you figure out what you really want as a flutist, then you can find the flute that will best serve you to meet those goals. As I stated at the beginning, professional flutes are an absolute joy to play on, and are well worth their cost.
However, if you cannot afford a professional model flute, but you really want to step-up from your step-up flute, then consider getting a hand cut headjoint. That one upgrade can really make a difference in your tone production. But caveat emptor (let the buyer beware), re-read the above sections on the professional flute body, and be sure you are willing to leave without that handmade masterpiece.
Above all have fun playing your flute!
Doctor Flute
Why Are Professional Flutes So Expensive? Flute Center Sponsored

Comparing 3 Professional Flutes Haynes Powell Brannen – Flute Center Sponsored

Professional Flute Extras – Do You Need Them?

3 Levels of Haynes Flutes Compared Custom Handmade vs Q Series Semi-Pro vs Amadeus Intermediate

If you are serious about trialing a professional model flute, please contact my friends at the Flute Center, and use my code for some special perks: DRFLUTE
To start your flute trial, you’ll first want to go to flutecenter.com and fill out the form. Here’s the link:
https://flutecenter.com/pages/trial-form
Then put my code: “DrFlute” in the box labeled “Influencer Code.”
This code gives you these extras with some exceptions:
*3 extra days to try your flute – that’s a 10-day trial instead of only 7 days
*6 extra months of warranty on your new flute – that’s 18 months instead of only 12 months
*Free Shipping of up to three flutes, piccolos, and/or headjoints at a time for trial!
*10% off sheet music
*Free domestic shipping on instrument purchases
Plus, when you purchase a new flute using my code, Flute Center will pay me a small commission. Thank you!
The post Why Are Professional Flutes So Expensive? appeared first on DoctorFlute.
]]>The post Does the Cut of Your Lip Plate Make a Difference on a Professional Flute? appeared first on DoctorFlute.
]]>The two 14K rose gold headjoints were compared on the same 14K rose gold flute.
The two Sterling silver headjoints were compared on the same Sterling silver flute.
Wow! What a huge difference between them! Their sound was clearly different. But what was instantly noticeable and distinctly different was their responsiveness and resistance.
Here is how Powell Flutes describes each headjoint:
The Lumina has style and panache. Supple yet responsive, it moves quickly throughout the range with little effort. This headjoint’s clean and energetic sound is the perfect complement to our more classic styles.
The Philharmonic is the iconic Powell sound; rich, deep, and intriguing. Offering the most resistance of all our styles, the Philharmonic features a broad, smooth lip plate reminiscent of the Louis Lot flutes. This style offers an extensive palette of colors which are perfect for blending with other instrument families in a symphony orchestra.
The powerhouse of our headjoint offerings, the Venti style combines the response of the Soloist with the richness of the Philharmonic. This style has a broad lip plate with a steep front angle, producing fantastic response and projection.
Powell Flutes make another cut that I did not test called the Soloist. Here’s it’s description:
With a wide range of dynamics and characteristics, the Soloist is the sports car of headjoints. Sleek and simple with its narrow, curved lip plate, this style is incredibly flexible. Designed for the player who demands precision and performance.
Different Lip Plates Produce Different Sounds
Just to be clear, we are comparing the lip plate on the headjoint. As you know, this is the part of the flute where your mouth makes contact and forms an embouchure to produce many various and beautiful musical sounds with an array of subtle differences in color unsurpassed by any other orchestral instrument (IMHO).
The shape and design of the lip plate has a large impact on your ability to produce some notes, as well as your ability to produce musical colors, or what some refer to as nuance. The differences include the size and shape of the lip plate and the hole, the steepness of the strike edge, the angle on the inside, as well as the metal of the riser. The curvature of the lip plate can even vary!
Professional flutists learn to work with their flute to make beautiful music regardless of the lip plate, or any other characteristic of their flute for that matter. So, do not be concerned about making a wrong choice in headjoint. You can learn to play on a challenging instrument, and you will likely be a better flutist for the effort.
Lumina Cut
Powell describes the Lumina as “supple yet responsive.” I think that is true. It is very, very responsive. It almost is too responsive, if that is possible. But wow it is really gorgeous!
I felt that response, it just pops right out there. The low register is phenomenal. You know what I mean, in that low register, especially after F when you sometimes have that delay – air then sound. Which we all work to get rid of. That is really not a problem with the Lumina!
I’m not even working at it. If I were to pick up my professional model silver Flute when my lip is not quite as warmed up as it could be, I would probably have to really think about it to get my low C to pop right out as it does with this Lumina cut headjoint!
I think it is easy to play. It is very bright, has good volume, and is very resonant. It has a good sharp volume to it. And so, I think it is beautiful. If you are playing a lot of 21st century music and you need that edgy type of sound, maybe the Lumina cut is the one you’re looking for.
Venti Cut
Powell describes the Venti as the “powerhouse” combining richness with responsiveness. Right away I could feel the projection. This headjoint has a big sound that could project through any group in any hall.
The low register seemed responsive. Although I was leaking a bit each time that I played a low C simply because I play on an inline G and this is an offset G. But I feel like the response in the low register is right there – it’s fast. There is no delay.
The third octave was also more responsive than my professional model flute. However, there was more resistance up there, as I cracked some notes. But I like the feel and am sure that after I played around with this headjoint that I would get the feel of it and have no problem up there.
Overall, the sound is bright and a little bit edgy. But it might be a little shrill at the top where I cracked.
Philharmonic Cut
Powell describes the Philharmonic as “offering the most resistance of all our styles.” I can say for certain that there is a huge difference in resistance between these two headjoints!
This begs an interesting question: Why do you want resistance?
Well, my professional model flute is a Haynes. It is the one that I play on. It is supposed to have a quite a bit of resistance. And I love it for that resistance! We want some resistance in our playing because that helps us to work with the sound. It helps the vibrations to be able to change and we can manipulate that to get the different colors that we are looking for.
So, I could tell the difference between the Lumina as soon as I started playing the Philharmonic. That resistance is there, but I kind of like it. I am used to having a little bit of resistance and I like it.
When you have a flute that has a little more resistance, you should not negate it right away. When you play one like the Lumina cut that is so easy, you might be convinced that this is the one for you because it was so easy. And maybe that is for you. Maybe that is what you want. But perhaps you can work with a headjoint like the Philharmonic and learn to achieve the different colors and the sounds that you desire.
When you understand the value of resistance, you will learn to work with things like the angle of your airstream. I would play around with that angle to determine where you will get the best tone. How do you need the strike edge to split the air? You will learn to get the rich warm sounds available.
The Philharmonic produces a darker in sound. The Lumina was brighter. Maybe I can get that brighter sound, but I will have to work at it a little bit. The darker sound is maybe warmer. The Philharmonic cut is what I think of as a typical gold sound. It has a warmer, darker sound. It takes a little bit of work to get that projection. But I hear the power, and I feel it in there too.
So, I felt that the Philharmonic would give me maybe more power, whereas the Lumina, which had a brighter sound, more instantaneous sound, might not have quite as much power. However, I do not think you would have any problem reaching the back of a hall if you did a recital with the Lumina.
My Preference
In the end I liked the resistance of the Philharmonic cut. I think that once I worked on it, that sound would be right there. Once we really warmed up to each other, this one for me would give me what I am looking for. I really enjoy this sound. So, I am not afraid of a little resistance.
So, when you are trying out flutes, try out these two different cuts on the same flute body. You need to decide which is better for you – the one that is right there that is easy to get, or the one that you have to work with it and make it work for you. Which one fits your lifestyle and your practicing habits?
Watch my videos and listen in as I comment on what I hear and feel as I play on each of these headjoints.
Can you hear the differences?
How much resistance do you prefer?
Let me know in the comments which one you think is the better one for me.
Have Fun!
DoctorFlute
Does the Cut of Your Lip Plate Make a Difference on a Professional Gold Flute? FCNY Sponsored
Does the Cut of Your Lip Plate Make a Difference on a Professional Silver Flute – FCNY Sponsored

Here are links to the flutes and headjoints demonstrated in this video:
If you follow these links to The Flute Center of NY, tell them I sent you by putting my code: “DrFlute” in the box labeled “Influencer Code.”
Thanks!
Verne Q. Powell Handmade Custom Flute in 14K Gold
14K rose-gold body with sterling silver mechanism, Powell pinless mechanism, soldered silver tone holes, silver rings, ribs, and posts, French (open hole) model, pointed key arms, white gold springs, Straubinger pads, .012” thin wall tubing, modern Powell scale, offset G, C# trill, D# roller, B footjoint. Handmade in USA.
https://flutecenter.com/collections/shop-by-brand/products/powell-custom-14ksk
Verne Q. Powell 14K Rose Gold Handcut Headjoint – 14K rose gold tube, lip plate, riser, and crown. Lumina cut. Handmade in USA.
Verne Q. Powell 14K Rose Gold Handcut Headjoint – 14K rose gold tube, lip plate, riser, and crown. Philharmonic cut. Handmade in USA.
https://flutecenter.com/products/hj-powell-14k
Verne Q. Powell Handmade Custom Flute in Sterling Silver
Sterling silver body and mechanism, Powell pinless mechanism, soldered silver tone holes, silver rings, ribs, and posts, French (open hole) model, pointed key arms, white gold springs, Straubinger pads, .016” standard wall tubing, modern Powell scale, offset G, C# trill, D# roller, B footjoint. Handmade in USA.
https://flutecenter.com/products/powell-custom-silv
Verne Q. Powell Custom Headjoint in Sterling Silver– Sterling silver tube, 14K gold lip plate and riser, .016” standard wall tubing. Venti cut & Philharmonic cut. Handmade in USA.
https://flutecenter.com/collections/shop-all-flute-headjoints?pf_t_level=Handmade&pf_v_brand=Powell
If you’re interested in setting up a flute trial, please consider FCNY and tell them I sent you (Code: DrFlute) to get some extras for free.
To start your flute trial, you’ll first want to go to flutecenter.com and fill out the form. Here’s the link:
https://flutecenter.com/pages/trial-form
Then put my code: “DrFlute” in the box labeled “Influencer Code.”
This code gives you these extras with some exceptions:
*3 extra days to try your flute – that’s a 10-day trial instead of only 7 days
*6 extra months of warranty on your new flute – that’s 18 months instead of only 12 months
*Free Shipping of up to three flutes, piccolos, and/or headjoints at a time for trial!
*10% off sheet music
*Free domestic shipping on instrument purchases
Plus, when you purchase a new flute using my code, FCNY will pay me a small commission. Thank you!
Thank you, Flute Center of New York, for sponsoring this video.
Why Are Professional Flutes So Expensive? Flute Center Sponsored

Should You Put a Professional Headjoint on an Intermediate Body – FluteTips 170

Finding Your Tone with a New Headjoint – FluteTips 158

The Difference Gold Makes on a Headjoint – FCNY Sponsored

How to Choose a New Headjoint For Your Flute – FluteTips 100

The post Does the Cut of Your Lip Plate Make a Difference on a Professional Flute? appeared first on DoctorFlute.
]]>The Flute Center of New York sent me a silver flute and a gold flute to test and compare to determine which one is better the silver flute or the gold flute.
Both flutes are professional model Powell flutes that are nearly identical except their silver and gold content (complete descriptions are below).
So, I played a bit of the Cantabile et Presto, ran through some scales, and tested the upper and lower registers. All while giving my commentary on what I heard from each flute.
But I would love it if you would listen closely to my video and let me know what you hear! What do you think about the difference between the silver flute and the gold flute? Do you agree with my analysis? Which flute you do you like best?
Silver Flute Test
So, I started my comparison with the silver flute. For “full disclosure” I own a professional model solid silver Haynes flute. I may be biased in that I am used to playing on silver. So, silver feels very comfortable to me.
Silver’s Low Register
Now, I think that this Powell flute is a really gorgeous instrument. The low register is just gorgeous and it's really popping out very easily. Now, sometimes that has to do with how this headjoint is cut and there are different cuts for the embouchure hole and the angle of the strike edge here. But that being said, I am still trying to compare similar to similar and it's really gorgeous.
Now, normally I think of silver as being a brighter sound, but I feel like this has a little bit of a darkness to it. The tubing is that standard walled (0.16”) on this instrument. So that is the middle. It's not the thin walled, it's not the heavy walled. But I still feel like there's a little bit of a darker sound to it.
However, even though it is darker, it is still nice and big. It has a really big sound.
Silver’s Third Octave
The high C popped out pretty easily! But I think it would take a little bit of me working with this headjoint, particularly to work on that third octave. But those high notes really popped out very quickly.
Gold Flute Test
The gold flute has a very different sound! Part of this might be that the headjoint has a different cut. But this would only be a small part of it.
I usually think of gold as a darker sound and the silver as the brighter. But I think in comparing these two, I think this gold flute has a little bit of a brighter sound.
But that being said, it really has a lot of edge to it. If you're playing a lot of 20th and 21st first century music, gold might be what you are looking to play on.
Gold’s Low Register
While I thought that the low notes really popped out very easily on the silver flute, I think they come out even easier on this gold instrument.
Gold’s Third Octave
Wow the gold third octave has really quite a different sound. I think that the sound up there in that third octave is a little bit more brilliant. I thought there was a lot of power on the silver. But I feel like I've got quite a bit of power on this. But the sound is so very, very different.
Playing Loudly
I think maybe the volume is the same as far as what I can achieve on a forte or double forte level. But you know something that's interesting is I feel like I have more control on the silver one and that with the gold flute I have less control. Maybe that's not true, but that's what I'm feeling. That with the silver flute I can contain it.
Almost like your personalities that the Gold Flute has the outgoing personality of that person that's the life of the party. And this silver one is the quiet, reserved person. But they might be quiet and reserved, but they have a lot to say. There's something inside that's really wanting to come out and you have to pull it out. And I feel that way with the silver flute.
Which is Better?
Now I have played on this particular flute with a different headjoint, and it sounded quite a bit different. And I will compare maybe that on a different video. So, it does make a difference the headjoint you have. So, if you are really sold on the power and the color that a gold flute can give you, you should really experiment with the headjoints. And if you're sold on the silver flute, experiment with silver headjoints and maybe add a little bit of gold because I think having a gold headjoint, having a gold lip plate or even just the gold riser can give you a little bit of that gold feeling on a silver flute. It might be the right balance for you.
So, if we go back to comparing these two and ask, which is better. You know what? I think that's for you to decide. There is no better. But I think maybe I might prefer the silver actually than the gold.
But they are gorgeous no matter what. So, if your choice is to say that gold sound, that's me, then go for it. If you have the funds to buy that, because you know it's quite a bit different in price range from a silver flute to a gold flute. And if that's what you're saving for, then go for it. This is for you.
If you like that more controlled sound and one that maybe you need to work a little bit, that's the silver flute. This one is then for you. I think that there's more possibilities, at least for me. There are more possibilities on the silver than there are on the gold. I feel like once I start playing that, that that's my sound and I may not be able to get a lot of different colors on that.
It might take time and I know plenty of people that play on gold, and they get lots of colors. But that has been a criticism of gold is that you don't have as many color changes. But probably today with the way that they can make the different headjoints and the different cuts of the embouchure hole, that there's a lot more available to you.
So, you want to try with a bunch of different headjoints and see which one is for you. For me, I think I would stay with silver even if I could have, you know, any flute in the world that I wished for. I think I'm a silver person. So, I would probably stay with it, although I like adding gold to the lip plate and the riser. So, I think that that would add what I'm looking for.
So, you tell me in the comments. Take a listen to these two and compare what you hear and see what you like best. Let me know which one you prefer that I play.
Have fun!
Doctor Flute
Watch me play and compare these 2 flutes:
Which is Better a Silver Flute or a Gold Flute? FCNY Sponsored
Here are the flutes demonstrated in this video:
If you follow these links to The Flute Center of NY, tell them I sent you by putting my code: “DrFlute” in the box labeled “Influencer Code.”
Thanks!
Powell Handmade Custom Flute in Sterling Silver
Sterling silver body and mechanism, Powell pinless mechanism, soldered silver tone holes, silver rings, ribs, and posts, French (open hole) model, pointed key arms, white gold springs, Straubinger pads, .016” standard wall tubing, modern Powell scale, offset G, C# trill, D# roller, B footjoint. Handmade in USA.
https://flutecenter.com/collections/shop-by-brand/products/powell-custom-silv
Verne Q. Powell Sterling Silver Handcut Headjoint – sterling silver (.925) tube, and crown, 14K gold lip plate and riser, .016” standard wall tubing. Venti cut. Handmade in USA.
Powell Handmade Custom Flute in 14K Gold
14K rose-gold body with sterling silver mechanism, Powell pinless mechanism, soldered silver tone holes, silver rings, ribs, and posts, French (open hole) model, pointed key arms, white gold springs, Straubinger pads, .012” thin wall tubing, modern Powell scale, offset G, C# trill, D# roller, B footjoint. Handmade in USA.
https://flutecenter.com/collections/shop-by-brand/products/powell-custom-14ksk
Verne Q. Powell 14K Rose Gold Handcut Headjoint – 14K rose gold tube, lip plate, riser, and crown. Lumina cut. Handmade in USA.
If you're interested in setting up a flute trial, please consider FCNY and tell them I sent you (Code: DrFlute) to get some extras for free.
To start your flute trial, you'll first want to go to flutecenter.com and fill out the form. Here’s the link:
https://flutecenter.com/pages/trial-form
Then put my code: “DrFlute” in the box labeled “Influencer Code.”
This code gives you these extras with some exceptions:
*3 extra days to try your flute – that’s a 10-day trial instead of only 7 days
*6 extra months of warranty on your new flute – that’s 18 months instead of only 12 months
*Free Shipping of up to three flutes, piccolos, and/or headjoints at a time for trial!
*10% off sheet music
*Free domestic shipping on instrument purchases
Plus, when you purchase a new flute using my code, FCNY will pay me a small commission. Thank you!
Thank you, Flute Center of New York, for sponsoring this video.
Which is Better a Silver Flute or a Gold Flute? FCNY Sponsored
How to Choose a New Headjoint For Your Flute - FluteTips 100

Comparing 5 Headjoints From Burkart Nagahara & Song Flute & Headjoint Makers
The Difference Gold Makes on a Headjoint - FCNY Sponsored
Flute Review Haynes Amadeus Model 680 Step Up Flute - FCNY Sponsored

Professional Flute Extras - Do You Need Them? FCNY Sponsored
Does Flute Tubing Thickness Matter - FCNY Sponsored

Helping Waverly Choose Her Next Step Up Flute - FCNY Sponsored

The post Which is Better a Silver Flute or a Gold Flute? appeared first on DoctorFlute.
]]>The post LefreQue – Results of Testing 4 LefreQue on 3 Levels of Flute appeared first on DoctorFlute.
]]>As you may already know, in July of 2018, I conducted my very first test of the LefreQue by playing my professional Haynes with a Rose Gold LefreQue and then a Silver LefreQue. The resulting blog and video of this test included a blind test and became one of my most viewed videos. Additionally, this test spurred a lot of questions and comments about the LefreQue from the simplest of questions desiring to know the correct pronunciation of this musical accessory, to the most cynical charge that it is nothing more than the proverbial snake oil.
At the end of that test, I was not certain that the LefreQue improved my tone and increased the ease of performance in the way that the inventor suggested. But I knew it did do something positive for me.
So, this time around, I wanted to dive a little deeper by demonstrating how the LefreQue Sound Bridge can actually change the sound (and feel) of 3 levels of flute; to answer some of the most commonly asked questions that I have gotten about the LefreQue; and to include some details about an independent test conducted by a peer-reviewed scientific journal.
Will this finally put to rest the question of whether or not YOU should get a LefreQue because it is THE solution that you have been searching for to improve your tone? Of course not! But what I can say with certainty is that if you get the correct LefreQue for your instrument, and attach it correctly, that it will in fact do for you – at least some of – what the inventor claims it will do. That is, in many ways it will improve your sound, and make it easier for you to play, especially the high notes and low notes.
The real question, that only you can answer is whether you like what it does for your sound. And whether the cost is worth it for you. It all comes down to preference. Do you prefer your sound with a LefreQue or without a LefreQue? I do hope that you will test them out and let me know your results.
In my opinion, if you have outgrown the flute you own, and cannot afford to upgrade your flute or headjoint, then a LefreQue is a much more economical option to extend the life of your instrument by helping you to produce a better tone and to have more enjoyment from performing. That is, the intermediate player stuck on a beginner flute, or the music school candidate looking for an edge with their intermediate flute would do well to look at the LefreQue.
Promises Made
The LefreQue is composed of two small pieces of metal that are bent in such a way to produce a small hump that “bridges” the lip between the segments of the flute: flute body and headjoint, body and foot, headjoint and crown. The LefreQue is designed to overcome the acoustical impact of these segments by allowing the tone to move with less resistance through the flute.
LefreQue promises you will achieve the following:
• Purer overtones
• Accurate tuning
• Clear response
• Smooth intervals
• Surround projection
• Extended dynamics
Promises Kept
On June 12, 2021, an independent article was published in “Acoustics” which is a peer-reviewed journal of acoustics science and engineering. This article is helpful in that it validates that the LefreQue Sound Bridge actually has an acoustical impact on the sound produced. It also describes the claims made by performers and conductors. Further, it provides an excellent definition of how the thing works.
Here is their definition, followed by a heavily edited quote about their results, and a link to the article for those who wish the read the somewhat technical jargon. As of the publication of this blog post, that article has had over 1,700 views.
“It is shown that a gold-plated device mounted… can change two characteristics of the radiated sound… thus, being beneficial for live performances in small halls with minimal acoustic optimization. The data further indicate that the occasionally hearable “rumble” [from playing out of tune with each other] of a wind instrument orchestra… might be reduced (or avoided).”
“The general concept of the sound bridge is to facilitate the transfer of vibrational energy from one part of the instrument to the next connected part. It is assumed that, at the first loose connection between the mouthpiece and the body of the wind, a loss in the transfer of vibrational energy occurs, which can be reduced through the use of a metal bridge, which is designed to transfer vibrational energy.”
The Magnitude of the Frequency Jitter of Acoustic Waves Generated by Wind Instruments Is of Relevance for the Live Performance of Music
By Alexander M. Rehm
https://doi.org/10.3390/acoustics3020027
Commonly Asked Questions:
How do you pronounce LefreQue?
The correct pronunciation is “le freak” as in “the frequency.” Although the inventor is not offended if you pronounce it like the ogre named Shrek as in “le freck” as long as you buy one, you can call it whatever you want.
Where do you place the LefreQue on your flute?
You can place the LefreQue on any or all the 3 places on your flute where metal pieces connect:
1. Crown to Headjoint
2. Headjoint to body
3. Body to footjoint
It is most commonly placed between the headjoint and body. In this position, you can use either the 76mm LefreQue which will bridge both ridges at the top of the body, or the 41mm LefreQue which will only bride the topmost ridge.
Regardless of which position you choose, the LefreQue should be attached to the bottom of your flute where there are no keys above or below it. In addition to the acoustical benefits of this placement, it also gives your audience a perfect view of the LefreQue when you are in playing position.
What does the LefreQue cost?
That depends on which LefreQue you buy. They run from the very economical under $100 USD (Brass) to the very expensive $10,000 USD (24K Solid Gold), depending on their metal composition.
The inventor says that you need to select a metal that is above the quality of the metal of your instrument. So, you would not use an inexpensive LefreQue on a professional model flute because it probably would not give you the desired results.
The 4 LefreQue that I tested:
76mm Fine Silver Gold-Plated – $675
41mm Red Brass Rose Gold-Plated – $300
41mm Red Brass Silver-Plated – $110
41mm Red Brass – $65
The prices listed were at the time of this publication and are subject to change with the whims of the spot prices of precious metals.
Will the LefreQue scratch your flute?
The simple answer is that the LefreQue could scratch your flute. Therefore, you are prohibited from attaching a LefreQue to a flute that is on loan to you for a trial.
You want to be very careful when you attach it to your flute. You are more likely to scratch your flute if you move the LefreQue after you have already attached it to your flute. If you forgot to place it where there are no keys, then the trick to moving it without scratching is to hold your flute firmly by the handle, then with your thumb and index finger pull the LefreQue away from your flute – stretching the band slightly – then reposition the LefreQue and gently release the tension in the band. By doing it this way, you will not slide metal on metal. This is what causes the scratches.
So, just be careful and you will not scratch your flute.
Do flutist perform with the LefreQue on their flute?
Yes, definitely! Because if it does what you want it to do – enhances your tone, makes it easier to hit some notes, better tuning, etc. – then of course you would want to perform with it on your flute.
Does the LefreQue weigh your instrument down?
The LefreQue does add weight to your flute, especially if you use 2 or 3 at the same time. But the real questions are whether the added weight is enough to give you hand problems, and does it throw off the perfect balance of the flute.
So, if you already have hand problems, then any additional weight added to your instrument may exasperate those problems. Otherwise, I did not find that the added weight of even the 76mm LefreQue to add too much weight that I thought it might cause me any problems. Additionally, it did not seem to throw off the balance in the slightest way.
How do you attach a LefreQue?
It is actually quite simple to attach them, once you get the hang of it. I have written out the process and published a blog with photos and made 2 videos demonstrating how to attach them properly. I hope you find these helpful. Have no fear. You will figure it out!
The Trials
Here are the combination of flutes and LefreQue that I used in my trials, and my opinions about what I heard and felt when I played.
Professional Haynes with 76mm Fine Silver Gold-Plated LefreQue
I could definitely hear a difference! I feel like it took the edge off, the diffused edge of my tone, and gave me only the center. So, I do think that it gave me a better tone, a more focused sound. I also think that it gives me a little bit bigger sound. And I think that while you could say it made my tone smaller, I think what I heard is that this has given me just the pure tone, which then projects a whole lot better.
You do in fact feel a difference in the resonance. The flute feels different. The LefreQue takes some of the vibrations that go through the flute and dampens them a little bit. So, the flute feels different in your hands because of that dampening.
I did not find the weight of this to be overwhelming. It does not really feel like it throws the balance off. Which I was probably a little bit concerned about.
When I was playing with the high register and really doing some high B’s and high C’s, I do think it responded a lot easier. With my flute, I feel like I do have to work kind of hard in the third octave to really make it respond and sound good. This LefreQue made those notes come out easier for me.
Professional Haynes with 41mm Red Brass Silver-Plated LefreQue
So, I thought this was a nice improvement. I like what it did for my tone. It did not make it feel smaller at all. It definitely felt a little bit more refined. I thought it gave a warmer quality to my tone and I could definitely hear the focus it gave to my tone.
I am not sure that it gave my high register any real boost as far as tonguing or response goes. It might be better intonation.
Professional Haynes with 41mm Red Brass Rose Gold-Plated LefreQue
Again, I could hear a difference. I am not sure it was the most beneficial for my tone. I actually felt like my tone was cracking a little bit more than usual. But I do feel like it opened my lower register, and it gave me a little bit bigger sound.
It is an in interesting sound that is definitely different. But is it better? I’m not sure.
Haynes Amadeus Intermediate with 41mm Red Brass Silver-Plated LefreQue
I think it really did add something to this instrument. It gave me a little bit more projection. I really did hear that. I felt like the sound really projected differently on this instrument. It also felt different in my hands – just like it did with the professional model flute.
I am not sure that it did anything in particular for the low register, other than generally overall I thought the tone changed.
Haynes Amadeus Intermediate with 41mm Red Brass Rose Gold-Plated LefreQue
I thought that this one really does something completely different with my tone. I felt like it warmed the tone up. But also, I felt like the response time is a little bit quicker in the low register and the high register.
So, to me there is a big difference in how this LefreQue sounds on this intermediate flute.
Trevor James Beginner with Red Brass LefreQue
I did hear a difference. I think that even this red brass takes off some of the edges that are a little bit more diffused and gives a more solid sound in the middle. So, I think that this is an improvement. And if you have a beginner flute and you don’t have the funds to upgrade right now, a less than $100 fix can give you a nice change that I think you would really appreciate.
Trevor James Beginner with Red Brass Silver-Plated LefreQue
I definitely heard a bigger sound. I think that this flute is projecting more too. It not only took off the edges like the red brass did, but it gave me a little bit more sound.
This could be a good solution for an intermediate player, playing a beginner flute. An economical solution that can extend the life of your beginner flute.
Trevor James Beginner with Red Brass Rose Gold-Plated LefreQue
This one gave me a totally different tone color! The Rose Gold seemed to sweeten up my tone. It still improved the projection. But it also gave me a little sweeter sound.
I really felt like the gold made a difference. And going from the brass to the silver plated to the gold plated, really three different sounds, three different price points – all economical choices to help you get the tone you’re looking for.
But for me, playing on this beginner flute, if I were to choose, I would go with the gold.
Conclusion
Now you might take the LefreQue off your flute and decide that you like your tone better without the LefreQue. That is perfectly fine and acceptable.
While my test showed me that the LefreQue does actually make a difference in my tone, I still think that the bottom line is preference.
Do you like your sound better with the LefreQue or without the LefreQue?
Do you find it easier to play your high and low registers with the LefreQue or without the LefreQue?
Do you like the way your flute looks and feels with the LefreQue or without the LefreQue?
If you can answer these questions, they will help you decide whether to buy them. In my opinion, they present an economical choice to improve your sound.
Let me know what you decide!
Have fun!
DoctorFlute
Watch my video demonstrating all these different LefreQue and let me know what you hear. Do you hear differences? If so, are they positive, negative, or neither?
LefreQue for Flute Testing 4 LefreQue on 3 Flute Levels – FCNY Sponsored
How to Attach a LefreQue to Your Flute

To LefreQue or Not to LefreQue. That is the Question. Can You Hear the Difference?

How to Attach a LefreQue to Your Flute Close Up

Woodify Ring for Flute Review by DoctorFlute – FCNY Sponsored

KraftGeek Capsule Music Stand Review by DoctorFlute

Here’s a list of the gear tested in this video:
William S. Haynes Handmade Custom Flute – Solid silver, hand-cut headjoint with 14K gold riser, silver body and mechanism, .016” standard wall tubing, inline G, B footjoint.
Haynes Handmade Custom Flute in Coin Silver – New
Amadeus by William S. Haynes Model 580 – Haynes Amadeus silver-plated headjoint with sterling silver (.925) lip plate and riser, silver-plated body and mechanism, drawn tone holes, French (open hole) model, pointed key arms, (.016″) tubing, offset G, B footjoint.
Amadeus by Haynes Model 580 Step-Up Flute – New
Trevor James Model 10X – silver-plated straight headjoint, body and mechanism, closed holes, C footjoint, offset G key, Pisoni Lucien Deluxe pads.
76mm Yellow Gold-Plated Solid Silver Lefreque Sound Bridge
76mm Yellow Gold-Plated Solid Silver Lefreque Sound Bridge
41mm Rose Gold-Plated Red Brass Lefreque Sound Bridge
Gold-Plated Red Brass LefreQue Sound Bridge with Band
41mm Silver-Plated Red Brass Lefreque Sound Bridge
41mm Silver-Plated Red Brass Lefreque Sound Bridge
41mm Red Brass Lefreque Sound Bridge
41mm Red Brass Lefreque Sound Bridge
If you follow these links to The Flute Center of NY, tell them I sent you by putting my code: “DrFlute” in the box labeled “Influencer Code.”
Thanks!
Thank you, Flute Center of New York, for sponsoring this video.
The post LefreQue – Results of Testing 4 LefreQue on 3 Levels of Flute appeared first on DoctorFlute.
]]>The post Bending Pitch to Work on Intonation appeared first on DoctorFlute.
]]>So, let’s talk about some tricks that you can use to really work on how to get in tune. Now, the first thing that we have is pulling your head joint in and out. So, when they play the tuning notes and you match that tuning note, you’re going to match it with your head joint going up or down.
I have my younger kids think that the way they get in tune, once they do that, then they’re in tune forever. That that’s it, that that’s the bottom line. I’ve got it out. I’m in tune with the tuner on a or with the trombones or whatever. And so that’s it. I don’t have to do anything else.
But we all know of the more mature flutists, that we must work on intonation on every note all the time because every note can be different. Every note is different with the different instruments we play with. If I play with an oboe right now, I have a group of an oboe and a bassoon, and their intonation issues are different from my intonation issues. And so, I have to be adjusting and thinking and listening all the time. But if you’ve got this in the right spot, then how do you fix intonation while you’re playing?
Well, one of the ways to do it is to bend the pitch. And by bending the pitch, you bring the pitch up or you bring the pitch down. So, it’s worthwhile to work on bending your pitch and how big of a bend can you get in your pitch? And then when you need it, you have that tool ready.
So, when we’re talking bending pitch, we’re not really saying roll in because I’ve seen that in bands in my elementary students with their band directors. So, they’ll say, Okay, just roll in. Sometimes they’re just desperate to get their bands to play in tune, and I don’t fault them for that. Just tell your flutist to, to put their head down or roll it in right, either or roll it because it will do what they need it to do. But that’s not really how we want to change our pitch. We want to practice it by having our airstream move right without our head. Because if our head moves, we’re really changing our tone and it doesn’t become a good tone, we still want to keep that good sound. So, if I practice bending the pitch, let me practice with my embouchure, I’m going to use my embouchure to do that.
Now I bent it, was there a little movement of my head? I’m sure there is a movement of my head and my eyebrows definitely have to go up that just part of it. You have to have your eyebrows go up and down when you play. If I move by embouchure sure I can really bring the pitch down a lot. It’s a little bit harder. You don’t get quite as much forward momentum by going up, but it still does go up and it can go up a little higher. Now, if I really need to go up even higher than that, I want to really lift my embouchure up out of that hole as much as I can to get in tune with whoever I have to get in tune with. Sometimes we have that problem in our highest octave is that’s, you know, our third octaves can either be really sharp or really flat, and we need to remove our embouchure in order to do that. So, practice bending. The more you practice it, the better you’ll get at it and the better you’ll get it. Keeping the tone really nice. It’s really hard not to do it without your eyebrows going up too.
I’m just moving my jaw back and forth. I’m moving that airstream. I want the airstream to move not my head. If I need to. I might do a little movement, but not a lot. I certainly don’t want to, when I move my head all the way down, I cover more embouchure hole and I’m not trying to do that. All I want to do is move my airstream and see how it’s cut on this outer edge. That’s what’s going to give me better intonation on the spur of the moment. Now, yes, you’re going to move your head joint in and out because that’s what’s necessary at the beginning to get in tune your major intonation issue and then all the minor ones that come along. You’re going to do it by bending your pitch. So then if I play just a G and I realize I’m a little bit sharp with now the oboe next to me, I’ve just lowered it. Now I’m in tune, but I haven’t changed my tone. It’s just a little bit of a difference. So, I still have the good tone that I had where, whereas if I move my head or a roll in, the whole tone sounds flat. It is not only that you’re lowering it, but also just there’s a muffled sound, in that the nice bright sound that you had goes away.
So that is what I would recommend you do to work on intonation within your ensemble, to work on every note, not to move the head a lot. We’re not going to be bobbing up and down, but to move your jaw, move your embouchure, your upper lip now going over your bottom or backing up a little bit as you even the lips out to bring in the airstream up a little higher. It’s all about manipulating that airstream.
So, practice bending pitch and you’ll really revolutionize your intonation issues and you’ll not have as many if you can do that.
Have fun!
DoctorFlute
Watch me demonstrate this idea:
Bending Pitch to Work on Intonation – FluteTips 167

FluteTips 86 Bending Your Pitch UP

FluteTips 62 Bending Pitch Extended Flute Technique
Autumn in Homeland for Solo Flute by Anže Rozman – Angela McBrearty Flute

The post Bending Pitch to Work on Intonation appeared first on DoctorFlute.
]]>All 3 rings noticeably changed the sound of the flute and produced different sounds than the other rings.
But do they measure up to the manufacturer's promises?
The post Would You Woodify? appeared first on DoctorFlute.
]]>The Woodify Sound Ring is a clever invention by Alessandro Baticci – flautist, composer, and CEO of Woodify. Aptly named, the Woodify Ring is a ring of precision cut and shaped wood which encircles the headjoint, close to the flute body, and is gently tightened by hand with a simple twist screw.
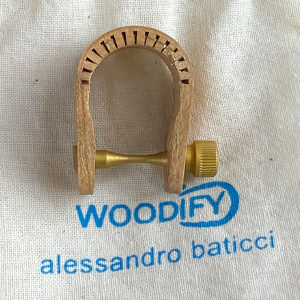 But don’t let the simplicity of this elegant little “sound solution” fool you. It clearly changes the sound of the flute. But does it deliver on its big promises?
Big Promises
Woodify claims to improve the sound of your instrument as follows:
- Add colors & depth to your tone
- Enhances your sound
- Increases your projection
- Increases the resistance of your headjoint
- Dampens vibrations, minimizing the loss of energy
- Centers your tone
- Focuses the sound
- Intensifies the harmonics of the flute sound
- Reduces the characteristic air noise
- Gain greater sound volume
- Darkens your tone
- Focuses your staccato
So, what do you think? Have you tried the Woodify Ring for Flute?
I made a video of myself testing 3 different Woodify Rings: Cherry Wood, Walnut, and Beech Wood. You can watch me try each ring for the first time and see my response in real-time.

Professional Model Demo
All 3 rings noticeably changed the sound of the flute and produced different sounds than the other rings. One would think that this is because the rings are made of different woods and thus interact with the flute differently. In fact, at the Woodify website, you select your instrument type first – silver flutes, gold flutes, lows flutes – then select the type of wood that the Woodify Ring is made from.
For my demonstration, I used a solid silver professional model Haynes (see full description below) and tried out the 3 different Woodify Rings recommended for silver flutes: Cherry Wood, Walnut, and Beech Wood.
Here’s my observations after my first trial:
Cherry Wood:
My sound is brighter, but not the richer sound I am usually looking for. It did focus my sound, as if it took out a bit of the airy edges and gave me only the pure sound. My upper register is a little bit darker. My staccato is more focused!
Walnut:
This Woodify Ring immediately gave me the WOW factor. It definitely darkened my tone! I like this effect because I think my tone is on the brighter side and I like something that gives me a darker sound. This is why on my own professional model Haynes flute I have a 14-carat gold riser. It darkens the sound a bit.
The walnut Woodify also removed some vibrations. I could feel the difference.
Beech Wood:
This Woodify Ring clearly sounds different than the other two, and different from no Woodify on the flute. This one makes my tone sound smaller, but edgier! And I kind of like that edgier sound.
The sound is focused immediately. You can tell playing staccato in the low register. It speaks easier. The low register speaks amazingly!
Woodify Wins My Vote
In summary, the Woodify Ring is a winner. I think they definitely improve your tone in the way that the Woodify maker says. So, if you want a simple way to improve your tone, get a Woodify Ring for Flute.
I will be asking for the Walnut Woodify for Christmas this year!
Have fun!
DoctorFlute
Here is the flute & headjoint demonstrated in this video:
If you follow these links to The Flute Center of NY, tell them I sent you by putting my code: “DrFlute” in the box labeled “Influencer Code.”
Thanks!
William S. Haynes Custom Handmade Silver Flute
All silver tubing, mechanism, tone holes, rings, ribs, and posts; lightweight pinless mechanism, soldered tone holes, French (open hole) model, pointed style key arms, gold springs, .016” standard wall tubing, inline G key, split-E mechanism, C# trill key, D# roller, and B footjoint. Handmade in USA.
flutecenter.com/products/william-s-haynes-handmade-flute-in-sterling-silver-soldered-tone-holes
Haynes Silver Handcut Headjoint – Coin Silver Tubing, Silver Lip Plate and riser, .016” standard wall tubing, Piedmont cut headjoint. Handmade in USA.
flutecenter.com/collections/customfl-haynes-headjoints
Watch my reactions as I try each Woodify for the first time:
Woodify Ring for Flute Review by DoctorFlute – FCNY Sponsored
KraftGeek Capsule Music Stand Review by DoctorFlute
To LefreQue or Not to LefreQue. That is the Question. Can You Hear the Difference?
What Do Gold Springs Do for Your Flute?

The post Would You Woodify? appeared first on DoctorFlute.
]]>The post Comparing Soldered Tone Holes with Drawn Tone Holes appeared first on DoctorFlute.
]]>Well first I did extensive research to learn what the flute makers say. Then I compared two professional model Haynes flutes – one with soldered tone holes, the other with drawn tone holes.
So, I will start by describing what the flute makers say about the difference between tone holes. Then I will tell you what I liked after testing both flutes.
Soldered Tone Holes
On a flute with soldered tone holes, the craftsman makes the tone hole separate from the flute body, and then solders the tone hole onto the flute body. So, some additional metal is used to solder the tone hole right into the hole that has been made in the flute tube.
The introduction of this additional soldering metal may change the sound slightly. Because it vibrates differently. It will have a different resonance. This difference may not be noticeable.
One of the benefits of making the tone hole separately from the flute body is that the tone hole can be made with a nearly perfect shape. This perfect tone hole combined with a technique called “undercutting” allows the key to fit more perfectly flush on top of the tone hole making a tighter seal. This in turn enables the flutist to experience a key that is less likely to leak. We have all experienced the frustration of leaky keys – yes of course that will always happen when the pads wear out. But a more perfectly fitting key & tone hole enables the pads to completely close the keys when our fingers tell them to.
Flute makers claim that soldered tone holes offer:
- More resonance
- More depth of tone
- Better (nearly perfect) intonation
- Darker sound – slightly less brilliant
- Better response
- More powerful dynamic range
- Larger range of colors
Drawn Tone Holes
On a flute with drawn tone holes, the craftsman makes the tone hole out of the flute body. While the metal is hot, they will create the hole and draw up the edges of the hole out of the existing metal of the flute tube. They will then roll down the drawn edges to make a smooth surface for the key to sit on top of it. That is basically a drawn tone hole on a flute.
One of the challenges with drawn tone holes is that sometimes the pads do not sit absolutely flush with the top of the tone hole. That is, the tone hole and the key do not have an absolutely perfect fit. Of course, the craftsmen know how to make the necessary adjustments to achieve a proper fit. This is simply an innate drawback.
Flute makers claim that drawn tone holes offer a brighter tone color.
Are they Better or Worse?
For my comparison I used the same headjoint on both flutes, switching between flute bodies so I could more clearly compare just the tone holes. First, I played the drawn then soldered listening for the differences mentioned by the flute makers. Then I went back and played both a second time moving more quickly from one to the other.
Playing Drawn
The brighter sound with the drawn tone holes was the biggest differentiator. I definitely hear that brighter sound, particularly in the low register. The brightness is just beautiful. It really booms right out. But I feel like I could still control it. It is still a gorgeous sound. It’s just brighter.
It is smooth though. It still has a very smooth tone. It is very resonant. Also, it is very present. It is right there in front of you. I like that tone. I don’t think it’s a bad tone. But it is definitely a brighter tone than perhaps the flute that I normally use.
I think the response is good – just what I would expect from a professional model flute.
Playing Soldered
Well, right away I feel so much more power coming from this instrument than I did with the drawn tone holes. I could definitely hear it. There is power. There is a definite larger sound coming from here.
I feel like I can get a really dark edge on this flute. This is a darker, richer sound.
The finger action on the soldered flute is little bit better. I feel like it’s easier to make it clean. That could be because of the more perfect seal that is achieved with soldered.
I am not positive, but I think I notice a slightly better response from the soldered.
My Preference
Both flutes are gorgeous to look at, felt great in my hands, and produced a nice tone. But for me, I like the darker sound of the soldered tone holes! I found myself playing around with instrument more, because it was really exciting to play. I think it is gorgeous. This sound is what appeals to me. Plus for the way I play, I like the control that I can get from this flute.
It is why I have a 14-karat gold riser in my headjoint. It gives me just a bit of a darker edge, just a little less bright.
I feel like the younger me would have liked the brighter sound better, but the older me likes this darker sound better. So, it depends on what year I was looking for a flute, whether I would pick the drawn or the soldered.
Is Soldered Worth it?
Soldered tone holes come with a price. The 2 professional model Haynes flutes that I tried were identical except for the inline vs. offset G key, and soldered vs. drawn tones holes.
At the time of this writing, the soldered cost about $3,000 USD more than the drawn, depending on the cost of silver, etc. That is an additional 25%.
However, there is a difference between these flutes that goes beyond price. Your opinion about which flute sound you like, and your budget, should be the deciding factors when choosing a flute. In other words, if you have the budget, then it is ultimately about your preference – which sound you like when you play. When possible, the deciding factor should be: do you like your sound on this flute?
So, when you get the chance to try out flutes, listen for which has a brighter tone color, or a darker sound, more resonance, more depth of tone, a better response, more powerful dynamic range, larger range of colors, and more power, etc. But, boil it all down to whether or not you like your sound.
Now you know what to listen for when comparing soldered tone holes to drawn tone holes.
Have fun!
Doctor Flute
Watch me demonstrate this:
Comparing Soldered Tone Holes with Drawn Tone Holes DoctorFlute – FCNY Sponsored
Here are the 2 flutes & 1 headjoint demonstrated:
William S. Haynes Custom Handmade Silver Flute – Soldered Tone Holes
All silver tubing, mechanism, tone holes, rings, ribs, and posts; lightweight pinless mechanism, soldered tone holes, French (open hole) model, pointed style key arms, gold springs, .016” standard wall tubing, inline G key, split-E mechanism, C# trill key, D# roller, and B footjoint. Handmade in USA.
William S. Haynes Custom Handmade Silver Flute – Drawn Tone Holes
All silver tubing, mechanism, tone holes, rings, ribs, and posts; lightweight pinless mechanism, drawn tone holes, French (open hole) model, pointed style key arms, gold springs, .016” standard wall tubing, offset G key, split-E mechanism, C# trill key, D# roller, and B footjoint. Handmade in USA.
https://flutecenter.com/products/haynes-silver
Haynes Silver Handcut Headjoint – Coin Silver Tubing, Silver Lip Plate and riser, .016” standard wall tubing, Piedmont cut headjoint. Handmade in USA.
https://flutecenter.com/collections/customfl-haynes-headjoints
If you’re interested in setting up a flute trial, please consider FCNY and tell them I sent you (Code: DrFlute) to get some extras for free.
To start your flute trial, you’ll first want to go to flutecenter.com and fill out the form. Here’s the link:
https://flutecenter.com/pages/trial-form
Then put my code: “DrFlute” in the box labeled “Influencer Code.”
This code gives you these extras with some exceptions:
*3 extra days to try your flute – that’s a 10-day trial instead of only 7 days
*6 extra months of warranty on your new flute – that’s 18 months instead of only 12 months
*Free Shipping of up to three flutes, piccolos, and/or headjoints at a time for trial!
*10% off sheet music
*Free domestic shipping on instrument purchases
Plus, when you purchase a new flute using my code, FCNY will pay me a small commission. Thank you!
Why Are Professional Flutes So Expensive? Flute Center Sponsored
Should You Put a Professional Headjoint on an Intermediate Body?
Professional Flute Extras – Do You Need Them? FCNY Sponsored
The post Comparing Soldered Tone Holes with Drawn Tone Holes appeared first on DoctorFlute.
]]>The post Does Flute Tubing Thickness Matter? appeared first on DoctorFlute.
]]>
Do you know that flutes come in different tube thicknesses? They do! Most flutes will come with the standard thickness of 0.16 inches. But when choosing a flute, it’s helpful to understand how tubing thickness can totally change the way you sound.
A lot of flutists don’t know about what each thickness can do for you. How does it enhance your tone? Does a thickness make the flute easier or mor difficult to play?
Let’s find out the answers to these questions.
Flute tubes come in 3 different thicknesses: .014”, .016”, and .018”. We call .014 inches "thin wall” tubing; 0.16 inches “standard wall” tubing; and .018 inches "heavy wall" tubing.
These subtle differences in the thickness of the flute metals change the weight of the flute that you can feel in your hands and hear when you play! Weight is important to understanding the differences in these flutes. More weight gives a weightier sound. Less weight gives a lighter and brighter sound.
.014” Thin Wall
A flute with the .014” thickness is a brighter, faster responding instrument. So, when you're playing it, the response time of your articulation is fast and clear. You could even say sharp (not in pitch). The tone is bright and big. This tone will carry in a recital hall. The tone has volume but perhaps not as much depth. This is the flute for you if you are not a big air performer. If you have perhaps a gentle air stream, this flute will respond for you. It will take your gentle air stream and focus the tone. The flute I tried in my video had a gorgeous sound. I am not a big air player so I think perhaps this flute may be something I should try.
.016” Standard Wall
My flute is a .016” standard wall flute. This flute has been my flute for the last 23 years and has seen me through a lot of performances. The standard wall flute gives you what might be considered “the best of both worlds.”
When I play this instrument in comparison to the .014” I can definitely hear how the sound is slightly darker. It does not have that immediate bright sound, but this darker sound is a bit more honey and less cotton candy. This flute will share some of the brightness but allows me to get an edgy sound if I want it.
I think that the quick response in articulation is still there, but it is different. After having just played a .014” I feel the difference in the response. With the thicker tubing there will be more weight to the instrument which gives more weight to articulation and sound.
Let's talk about weight. When I pick up both instruments, I don’t really feel a big difference between .014” and 0.16”. If you are worried about your hands, the difference in weight it is negligible.
.018” Heavy Wall
When I play this flute there is a definite feeing of more resistance. But it is this resistance that gives this flute a dark sound, a mellow but very rich sound. A .018” can have an absolutely gorgeous sound just because that added thickness gives the vibrations more metal to go through to create this sound. Now, I feel that I have a little bit smaller sound on a .018” because I have to work a little bit harder to get that sound out.
I feel like the third octave warms up a lot more with the 0.18”. It isn’t quite so bright up there and that is a beautiful thing as we all have difficulty getting those overtones in the third octave.
If we talk about weight this is where you need to be concerned. The added weight of a .018” can be felt in your hands. I can feel that between my 0.16” flute and the heavy wall the heavy wall is heavier. If you have any hand/wrist/arm issues I wouldn’t recommend the heavy wall. I personally feel that while I like the sound, I don’t think the added weight would be good for my hands. Maybe if I grew up in my professional career with a heavy wall, my hands and wrists would have gotten used to it and it would feel natural but at this stage of life I wouldn’t switch.
So, let's just talk about you as a player. If you feel like you do not have a lot of air, that maybe you are a gentler player without tons of air and perhaps you don’t have a big sound, then maybe a .014” will brighten and open up your sound and give you a little bigger sound. However, if you are a big player and you have all a lot of air and you have a lot of volume, then you should go for the .018”. That heavy wall will help control all that air and give you a focus to your tone.
What thickness is right for your tone? In the end it comes down to preference. How much air do you use when you play? Do you like that brighter sound that really responds, or are you a darker sound lover? Which resonance appeals to you? There is no right or wrong choice. It is more of deciding which flute gives you the sound you are looking for.
Enjoy trying flutes with different thicknesses and see what they can do for you.
Have fun!
DoctorFlute
Watch me demonstrate this:
Does Flute Tubing Thickness Matter - FCNY Sponsored
Why Are Professional Flutes So Expensive? Flute Center Sponsored
Should You Put a Professional Headjoint on an Intermediate Body? FluteTips 170
The post Does Flute Tubing Thickness Matter? appeared first on DoctorFlute.
]]>The post How to Attach a LefreQue to Your Flute appeared first on DoctorFlute.
]]>The LefreQue consists of 2 metal plates, and 1 elastic band that has a small ball built into it.
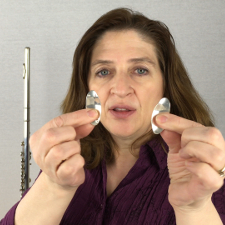
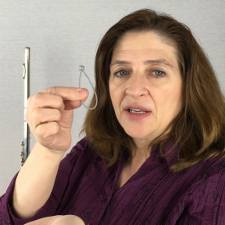
To attached the LefreQue to your flute, place the plate without dots in the palm of your left hand, perpendicular to your fingers. Then place the plate WITH dots on top of the plate without dots.
Then place the elastic band on top of both plates with the ball extended toward your fingers.
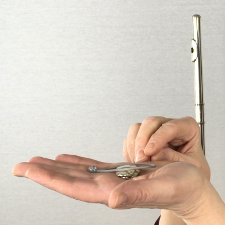
Then with your right hand pick up both plates by placing your right thumb between the band and the plates, and your right middle finger between the plates and the ball on the band.
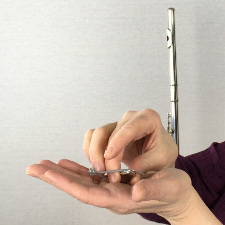
Pick up the plates with your right hand and turn them over, while gently squeezing the band together between your index, middle and ring fingers. Then, gently pull the ball so that the extra length of band is on the ball side of the plates.
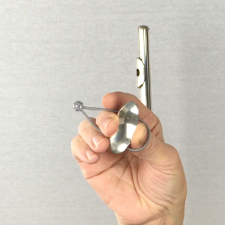
With your left hand, turn your flute (while on the flute stand) so the lip plate faces away from you exposing the bottom of the flute. You will attach the LefreQue directly above the place in the flute body where there are no keys.
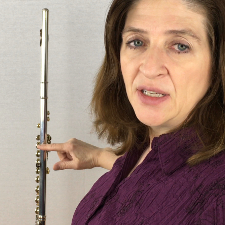
With your right hand, place the LefreQue on your flute so that the top edge of the LefreQue is at the base of your headjoint, the bottom edge of the LefreQue is on the flute body, and the curved part of the LefreQue goes over the raised seam at the tip of the flute body.
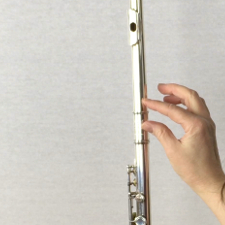
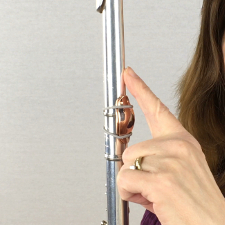
Then with your left thumb and index finger pinch the band while simultaneously pulling the ball with your left middle finger. The idea is to pull the band over the ball and drop it down behind the ball forming a tight hold on the two plates.
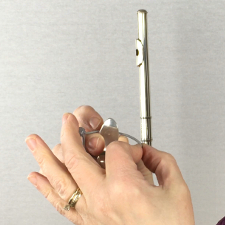
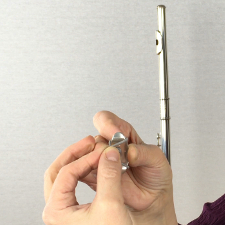
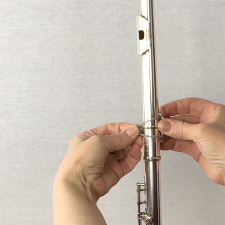
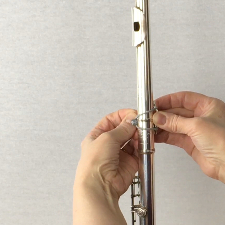
If you need to adjust the position of the LefreQue to move it to where there are no keys, first hold the flute body just below the headjoint and LefreQue. With your free hand, pinch both plates and pull them away from your flute, then turn them to the correct position. This will keep them from scratching your flute. That is, if you just turn the LefreQue while it is tightly attached to your flute, you will likely scratch your flute.
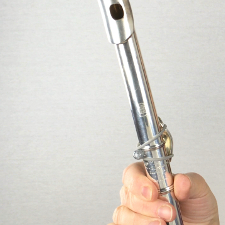
The LefreQue should be positioned away from your face, starting on the outer edge of the lip plate. When you look down your flute, the LefreQue plates are not in line with any keys. They are more in line with open metal.
To remove the LefreQue just reverse the process by pulling the elastic band back over the ball to loosen the plates. Be sure to have your hand securely on the LefreQue plates and elastic band. Otherwise, the plates may fall to the floor and the band may shoot across the room.
It really gets quite easy after you’ve done it a few times. You can watch me put one on for the first time in the videos linked below.
Have fun!
Doctor Flute
How to Attach a LefreQue to Your Flute

How to Attach a LefreQue to Your Flute Close Up
To LefreQue or Not to LefreQue That is the Question Can You Hear the Difference

LefreQue for Flute Testing 4 LefreQue on 3 Flute Levels – FCNY Sponsored
The post How to Attach a LefreQue to Your Flute appeared first on DoctorFlute.
]]>The post Flutes Through the Years appeared first on DoctorFlute.
]]>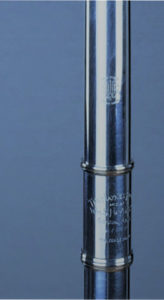
When I began flute lessons at school in 4th grade, my Dad was the high school band director. He got me a Gemeinhardt from the schools assortment of instruments. I called it my “Gemmyhart.” Who can say that name when you’re in elementary school? I mean really! But I loved that flute. I can still remember the brown case with white stitching (or what used to be white, now a shade of taupe). I think the interior was blue. But I’m not sure of that.
That flute took my a long way. It wasn’t standard at that time for everyone to have an intermediate flute with a B foot and open hole. It was quite acceptable to be in high school and play in the All-Counties and All-States with a beginner flute. I did look VERY enviously at anyone who had an intermediate flute. Those open holes man did they look exciting. But my Dad was a teacher, my mom worked sometimes and other times was home with us.There were four kids and no extra money for fancy flutes. But, I also had made it clear that while I liked the field of music, it wasn’t for me, that was the family business,
I was going to be a veterinarian not a musician.
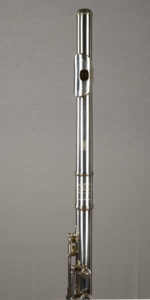 I fought the my fate for all my years of high school and surrendered when I was a senior in high school when I finally got private lessons. My parents got me to take lessons from Georgetta Maiolo who was teaching at Ithaca College and Binghamton University where she still is today. Well I took flute more seriously from this point on. I auditioned for a small college in Western NY and took my Gemeinhart with me. It was in my second year when it became very apparent that I couldn’t compete with a beginner flute so my parents found a used Armstrong that had the longed for open hole with a B foot.
Oh man did I think it was great. I thought I had arrived in the flute world except that my nemesis at college had the enviable flute – she had a professional hand made flute. (I’m talking about you Martha!) I was always one step behind! It was okay, although jealousy reared its ugly head only from time to time. The rest of the time I was just excited that I now had a real flute. Then came senior year of college and the senior recital and auditions for grad school. It wasn’t a given at that time that you would and should go to grad school. So, I researched grad schools on my own but decided that I wanted to study with Georgetta Maiolo. That meant either BU or IC. I got into both with assistantship. But what swayed me to go to BU was that they waived tuition and paid besides. The one hitch is that I was told I had to have a professional model flute.
Great news! Now I had to get a top-of-the-line flute. Whoo hooo!
Georgetta had a guy. You know THE GUY that dealt in flutes and repaired them. I went somewhere in NJ, no recollection where at this point. Hey, I didn’t do the driving and I probably read the whole way. A flute was pretty much chosen for me before I got there. That was fine, what did I know of picking out a flute. If my teacher thought this one was good then it was good. Oh man it was beautiful. All solid silver and smooth as silk. Oh it was a wonderful day. I loved this flute. It was my first solid silver and it took a while to get the sound out of it that it could give me. This beloved flute was a Haynes, Deveau scale. I was even thrilled with the case because up to now I just had a flute with one of those built in handles and now this was just a case with the out case cover. Now was my time!
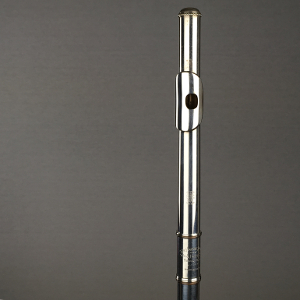 This flute stayed with me a long time. It got me through an MM, through teaching public school for a few years, through a DMA at Eastman, through interviewing and playing for a professorship and auditions for a principle position in an orchestra. I used this flute until Thanksgiving the year 1999. I thought that It was time for a new instrument. I had changed as a player through all that time and now I needed flute that reflected my new time in life.
I called a dealer and made an appointment to go to Queens, New York City.
That was some experience. The dealer had many flutes out and I went back and fourth for hours and narrowed it down to a Haynes, a Powell, and a Muramatsu. They were all beautiful and I thought that I was ready to move to a different flute maker, that I was done with Haynes and it was time to move on.
But in the end I couldn’t get away from my first love. I fell in love with a Haynes and that’s what I play today. Now, I know that I would have been happy with any of those choices. However, the Haynes just fit my hands and I couldn’t put it down.
It’s a beautiful thing.
So whats your flute story? Do you change often or have you purchased one flute and it’s your baby until death-do-you-part?
Doctor Flute
The post Flutes Through the Years appeared first on DoctorFlute.
]]>